Inside TFS
Coded UI Tests: Creating a Coded UI Test in Visual Studio 2010
Mickey Gousset explains the new Coded UI Test in Visual Studio 2010, and shows us how to create a basic test. Part 1 in a series.
Visual Studio 2010 has added a lot of support for testing, especially for manual testing. In the past, when wanting to perform any sort of UI testing with Visual Studio, a manual test had to be used. The problem with manual testing is just that, it is manual, which requires human interaction. To solve this problem, Visual Studio 2010 has introduced a new type of test, called a Coded UI test, to help automate functional UI testing.
A Coded UI Test is not an automated test in the same vein as say, a unit test. Instead, a coded UI test actually runs and navigates through the application being tested, while validating UI elements to confirm the application is performing as expected. In essence, when a coded UI test runs, it is simulating a real human being running the application.
From a technical perspective, coded UI tests are created using either C# or Visual Basic. While Visual Studio 2010 does provide tools to help automate the process, at some point you may still have to write some code, which means anyone creating coded UI tests may need some development skills. One other requirement for creating Coded UI tests is that the application being tested must have been built using a supported technology, such as Windows Forms or HTML. The Visual Studio 2010 documentation has a list of current supported technologies, and this list is expected to grow over time.
Creating A Coded UI Test Using the Coded UI Test Builder
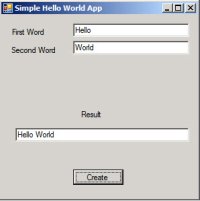
For our first introduction to coded UI testing, we will use a simple Hello World application, shown in Figure 1.
[Click on image for larger view.] |
| Figure 1. Simple Hello World Application. |
This application takes the data entered into the First Word textbox, concatenates it with the data from the Second Word textbox, including a space between the words, and displays the result in the Result textbox.
Before we can create our Coded UI Test, we need to also add a test project to our Visual Studio solution. Once we have our test project, we can begin creating our coded UI test.
To add a new coded UI test to the test project, right-click on the test project in Solution Explorer, and select Add | New Test. This opens the Add New Test window. Select Coded UI Test, and name it, as shown in Figure 2. Click OK to close this window.
Click OK, and a new windows opens, shown in Figure 3.
This dialog box gives you options to help generate the code related to test. You have the ability to use an existing action recording, which is a recording made during a manual test run. You also have the ability to record your actions now, and then add validation to the recording. Select "Record actions, edit UI MAP or add assertions" and click OK to start the recording process. Visual Studio will minimize, and the Coded UI Test Builder will open in the lower right corner of your screen (Figure 4).
This window is responsible for recording your tests, generating source code from your recording, and selecting and identifying properties of controls that need validation. Click the red Record button to begin recording the test. Once recording starts, you can pause the recording at any point by clicking the Pause button that will appear on the Coded UI Test Builder window.
Once the recording has started, run the simple Hello World application (I did this by creating a shortcut to the app on my desktop, and double-clicking the shortcut). Enter a value in each field, and click the Create button to concatenate the two values together and display the result in the Results field. Click the Pause button to pause the recording.
To see the steps that have been recorded, click the Show Recorded Steps button in the Coded UI Test Builder window, or press Alt+S. The results are shown in a popup window as shown in Figure 5.
Now we want to add the validation/assertion logic to ensure that we are getting the correct result. First we need to take the recording and turn it into source code. In the Coded UI Test Builder window, click the Generate Code button (or press Alt+G). You will be prompted to give the generated code method name a name (Figure 6).
Click the Add and Generate button to convert the recording into source code, using the method name specified.
Next we want to add some validation logic. Notice on the Coded UI Test Builder window, that the crosshair icon is now enabled. You use this icon to add validation/assertion logic to your test. For this scenario, we want to validate the data in the Results textbox. Click and hold to select the crosshair icon, then drag it over the Results textbox in the application. A blue box will appear around the text box, highlighting it and indicating it is the target. Release the mouse button to select the control as the target. The properties for the selected control will be displayed in the lower right corner of the screen (Figure 7).
For this validation test, we want to make sure the results textbox is displaying the correct value. In the Properties window, select the Text property, then click the Add Assertion button at the top of the window. A dialog window will appear to help build the assertion (Figure 8).
For this scenario, the default values are fine. We could select a different comparison option from the drop down list box, or change the comparison value, if required. Click the OK button to create the assertion. Notice in the Property window (Figure 9) there is a check mark next to the Text field, indicating an assertion targeting that field. Hovering the mouse over the checkmark will display information about the assertion.
The validation code that was just added now needs to be turned into source code. Click the Generate Code button again to do this. We will be prompted to give your assertion a method name (such as AssertHelloWorld). Click the Add and Generate button to generate the source code related to our assertion.
At this point, we can click the record button and record more tests and validations. Once we are finished, simply close the Coded UI Test Builder to return to Visual Studio.
In this column, we have discussed what coded UI tests are, and shown how to record a simple coded UI test and add validation to it. In our next column, we'll examine the code created by the Coded UI Test Builder, and show how to run the tests.
About the Author
Mickey Gousset spends his days as a principal consultant for Infront Consulting Group. Gousset is lead author of "Professional Application Lifecycle Management with Visual Studio 2012" (Wrox, 2012) and frequents the speaker circuit singing the praises of ALM and DevOps. He also blogs at ALM Rocks!. Gousset is one of the original Team System/ALM MVPs and has held the award since 2005.