In-Depth
Developer Tips: Making the SharePoint Transition
ASP.NET developers can have trouble finding their way through the SharePoint maze, because much of what they know is wrong. Here's a baker's dozen of tips to lead you in the right direction.
If you're an ASP.NET developer thinking about getting involved in SharePoint: Congratulations! You've picked an excellent time to get started -- there's been a tremendous evolution in the quality of the product and the tools available to you. But to find your way into the SharePoint market, you'll need to do and think about things differently. The goal in this article is to get you going in the right direction and provide some hints on the first set of turns in the SharePoint maze.
The most important tip, first: Adjust to the SharePoint reality. SharePoint creates its own special "non-ASP.NET" reality. For instance, you'll need to get used to SharePoint behaving oddly from time to time, especially in your development environment. Things that don't work the first time will work the second time (and every time thereafter). Things that have been working in your development environment will suddenly stop working and never work again.
One of the reasons for this is that SharePoint keeps track of components by GUIDs, and it's surprising -- at least, surprising to me -- how easy it is to get one GUID assigned to two different things (or two versions of the same thing). Either way, you'll be unable to move forward. The latest version of SharePoint seems to be better behaved, but it's still SharePoint. Don't waste time complaining about it. This is reality: adjust.
Your Development Environment
Which leads to the second tip: Deal with the SharePoint reality by never developing directly on a real computer -- always develop in a virtual machine (VM). For production purposes, SharePoint requires Windows Server 2008. But, for development, you can install SharePoint Foundation on Windows Vista or Windows 7 (SharePoint Foundation is free and included with Windows Server 2008, but you'll have to download it for Windows Vista or Windows 7).
Your VM will also need SQL Server 2008 SP1, SQL Server 2008 R2 or 64-bit SQL Server 2005 SP3. Also install Internet Explorer 7 or Internet Explorer 8 (32-bit version) on your dev machine -- they're the only browsers that work with all of the SharePoint features. Even the 64-bit versions of Internet Explorer 7 and Internet Explorer 8 have some limitations (at least until Microsoft releases an ActiveX control to fill in the gaps).
After installing SharePoint Foundation on your VM, use the stsadm export option to make an archive of the production site that you'll be installing to (assuming that such a thing exists). Copy that to your VM and use the stsadm import option to whack that archive onto your VM. Then, make a backup of your VM. Finally, be prepared to abandon your VM and return to your backup at any time when SharePoint gets weird.
You'll also want to tweak your web.config files so that you can get your error messages. Good news: Visual Studio 2010 will update the web.config file in the inetpub folder that SharePoint uses. Bad news: SharePoint has its own copy of the web.config file that you'll also need to tweak. As you might expect, SharePoint keeps its web.config file in a special place: the Hive. For SharePoint 2010, the Hive is in C:\Program Files\Common Files\Microsoft Shared\Web Server Extensions\14. In the Template/Layouts folder, you'll find a web.config file; find its customErrors tag and set the mode attribute to "Off."
Finally, turn on the SharePoint Developer Dashboard using the stsadm to add some debugging information to your pages. The Dashboard adds a lot of information to the page and, most of the time, you probably won't want it. So, when you activate the Dashboard, use the OnDemand option. This adds an icon to every page that lets you turn the Dashboard information on and off.
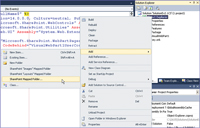
[Click on image for larger view.] |
| Figure 1. New Features in Visual Studio 2010 for SharePoint development include the ability to map project folders to SharePoint, and manage the SharePoint deployment process from build through package and deploy. |
Think Excel, Not SQL Server
As an ASP.NET developer, there's lots of stuff you know how to develop that works in SharePoint: Web Pages and Master Pages, for instance. The problem is, that knowledge is seductive. Your first inclination will be to build pages. Third tip: don't.
SharePoint is all about lists, so your first choice in customizing SharePoint should be in extending a list rather than writing a new page. The way SharePoint handles data is more like Excel than a database. There's probably more data stored in Excel spreadsheets than in any other database because Excel makes it so easy for users to manipulate data. This is also the secret of SharePoint (along with customization): SharePoint is data that users can manage. Adding a new list is "the SharePoint way" for creating new pages for your site, and should be your first choice for extending SharePoint.
In other words, don't think "Sales Order Management Page"; think "List of Active Sales Orders."
However, just because a list is like a table doesn't mean you should treat lists like a database table. There are all sorts of things your users can't do with a SharePoint list that can be done with a database table: joining it to another table, for instance. Filtering options are considerably more limited in SharePoint than they are in a full-fledged database. Faced with a long list, users may have to do a lot of scrolling to find what they want.
The corollary to this is that if the data you're storing would make sense in an Excel spreadsheet, it'll probably make sense as a SharePoint list, only better. Standalone data makes a good SharePoint list. If a list is short enough that users can reasonably expect to scroll through it (what your users regard as reasonable will vary) then it's even more likely it will work well in SharePoint. And, unlike putting this information in a spreadsheet, lists in SharePoint are shared by default. SharePoint also goes beyond Excel in the power it gives you in defining lists.
For instance, you're not limited to just lists of data in SharePoint: You can attach files to items in a SharePoint list. If you want to implement version control over those files, then you'll want to create a document library instead of a list. Make lists your friend.
Be a SharePoint User
Fourth tip: When it comes time to define your first list, leverage SharePoint. While you can define lists in Visual Studio and install them in SharePoint, don't. It's much, much easier to define a list in the SharePoint UI. Unless you need to deploy a new list to several sites, log onto SharePoint and define your lists in its UI. Heck, even if you do need to deploy a list to several sites, still define it using the SharePoint UI. Once you've defined a list in SharePoint, you can export it into a format that you can suck into Visual Studio.
SharePoint provides a wide variety of predefined list templates that you can use as your start point for a new list. Often, creating a new list consists of picking the right template and then removing the columns you don't want. You can also add new columns to your list from an inventory of stock column definitions that SharePoint comes with. If you can't find a SharePoint column that meets your needs -- for example, a column with a predefined list of values that will be displayed in a drop-down list -- don't write code! Instead, define a new column definition and add it to the SharePoint inventory. This is a case where Visual Studio can be helpful: The SharePoint markup language (CAML) will let you define a column type that you can install into SharePoint and then use in your list.
That's the fifth tip: After creating a list, extend it. Learn how to add events to lists. While you can attach events to changes in a list's structure, the real money is adding events to changes in a list's data: additions, deletions and updates.
You can leverage your ASP.NET experience here. The event model for list-driven events is similar to the model that ASP.NET uses for updates on DataSources. More importantly, extending events typically means integrating business logic into SharePoint, which is what ASP.NET developers do best.
SharePoint Object Model
The sixth tip is so obvious it hardly counts: Learn the SharePoint object model. These are the objects that you'll manipulate from your list's event code. Start by picking up the object that represents a SharePoint Site Collection, which contains a set of SharePoint sites. This object is called, unfortunately, SPSite; the object that represents a SharePoint Site is called SPWeb. (No, there's no such thing as a "SharePoint Web.") As I said, SharePoint has its own reality.
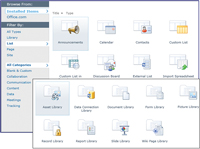
[Click on image for larger view.] |
| Figure 2. The smart way to add a list to SharePoint is not to use Visual Studio -- SharePoint provides numerous templates for both lists and document libraries that give you a better place to start. |
Good news: The object that represents a list is called SPList and the object that represents an item in the list is an SPListItem. The object that represents an attached file is SPFile. These are your primary objects. There are lots of ways to access the site, collection and list that your code is running in. But the simplest is to use the SPContext.Current object -- just like the ASP.NET HttpContext.Current object.
When working with these objects, remember that SharePoint is a special combination of managed and unmanaged code. As a result, if you instantiate a SharePoint object, it may not be garbage collected as soon as you might like. Tip seven: Always instantiate a SharePoint object in a using block so that, at the very least, the object's Dispose method will be called when you're done -- and don't try to dispose the objects you retrieve from the SPContext object. This will reduce the amount of SharePoint weirdness in your production site.
Building WebParts
If a list isn't what you need, your second choice (tip eight) is a WebPart. In SharePoint, it's all about customization (after being all about lists, of course), and WebParts are the primary point of customization. Users can add WebParts to their pages when and where they want them.
SharePoint has introduced Visual WebParts that can be defined visually like an ASP.NET user control. However, they have some limitations, the primary one being that they can't be used in a SharePoint sandboxed solution. So, as fond as you are of your ASP.NET user controls, concentrate on learning how to build ASP.NET server-side controls -- these are the real WebParts in SharePoint.
You'll be able to leverage your knowledge of ASP.NET controls, though you'll have to learn how to use the CreateChildControls method. You'll need to add to that knowledge how to use the attributes that flag properties for customization and how to create custom property editors (not hard to learn). If you want to be a real wizard, you'll also want to learn how to support connecting WebParts on the same page.
Building Pages
If you must, build pages. The biggest blunder that ASP.NET developers can make when developing for SharePoint is to build lots and lots of pages whose content is set at design time. That's not the "SharePoint way." In SharePoint, what's delivered to the user doesn't represent a page so much as a collection of resources combined into a single set of HTML.
The URL sent by a user to SharePoint is, essentially, a RESTful request. SharePoint does use the URL to retrieve a base page (and its Master Page). But SharePoint then goes on to determine if there's any additional content for the page stored in the site's content database. If some content is found, SharePoint inserts it into the template. SharePoint then goes on to determine if the current user has any special content for the page -- such as WebParts -- and inserts that into the template, also. So, as Gertrude Stein commented about Los Angeles, "There's no there, there."
Therefore, the ninth tip is to develop in the SharePoint mindset, and don't build pages, build templates: pages as places where users can add WebParts. And don't think you can go to your site's folder and find your template pages. As you can assume with the SharePoint reality, those templates are stored someplace different: the Hive. To a certain extent you have to know this, because it's your responsibility to put your templates into the right place in the Hive.
Deploying
You'll have to learn about the SharePoint deployment process so you can back out your changes when things get weird.
Installing a new page or template into SharePoint is a four-step process: First, you must get the page into the right place in the Hive. Visual Studio 2010 supports this by letting you map folders in your application to folders in the Hive. Here's the 10th tip: Never put your files directly into a Hive folder. Create your own subfolder inside the Visual Studio mapped folder and put your page in the subfolder. That will keep your custom pages separate from SharePoint's while still putting your page in the right Hive folder.
The second step in deploying to SharePoint is to describe what you're adding to SharePoint. This involves putting content into two files: feature.xml and elements.xml. The good news is that you don't have to write these files from scratch -- Visual Studio 2010 will create the base versions of these files for you if you use its templates. The two XML files describe what you're installing as a "SharePoint feature." You just need to add information that Visual Studio can't figure out (for example, a description of your feature).
Features are bundled up into solutions, which are what are actually installed into SharePoint. Bundling up features into solutions requires more XML files but, again, Visual Studio 2010 will create those for you (and let you modify them if you need to). To bundle up your features into a solution, right-click on your SharePoint project and pick Package, which generates a .wsp file, the SharePoint equivalent of an .msi file.
Third, you need to deploy, which means copying the files to the right folder, letting SharePoint know about your new feature, and cycling IIS. Again, Visual Studio 2010 will take care of this for you: right-click on your feature and select Deploy.
Finally, you need to activate your feature in the SharePoint site. In theory, this involves going to the Features list for the site, finding your feature and clicking the Activate button (most of the information in the feature.xml file is used to update this list). In practice, the solution created by Visual Studio will automatically activate the feature in your test system. You can turn this option off in the Properties window, but why would you want to?
Or: Skip all that and just press F5. Visual Studio 2010 will not only take care of the whole process, but also start Internet Explorer and have it browse your SharePoint site. Debugging will work pretty much as you expect. So why do you need to know the "real" process?
First, because sometimes Internet Explorer will get to your site before IIS finishes restarting and you'll get an error. Be patient, wait a few seconds, and then press the refresh button. Or follow my 11th tip: In IIS, for the application pool's Advanced Settings for the SharePoint site, set Ping Enabled to False and Maximum Response Time to 600. Fundamentally this just transfers the patience from you to Internet Explorer. These changes may not make the problem go away completely, but they will reduce its frequency.
The other reason you need to know the deployment process is that, eventually, you'll need to back out a change (often because you find that you can no longer install your latest version). So the 12th tip: Memorize this process for backing out your feature. First, go to the SharePoint site features list and deactivate your feature. Then, in Visual Studio, right-click in Solution Explorer and pick Retract to pull your feature's files out of the Hive.
Note that, to move your feature to a production system, you'll need to find the .wsp file in your project's bin folder. Copy this file to your production server. You (or the site admin) will need to use stsadm or Windows PowerShell to install your solution on the production site.
Don't Think of SharePoint as Standalone
One last tip, to make a baker's dozen. With the latest version of SharePoint, Microsoft has made it easier to integrate SharePoint with other applications. The Client Object Model lets you access SharePoint objects via Web services from, for instance, your ASP.NET site. Maybe you can make yourself useful to the SharePoint team without having to enter the SharePoint reality.