Inside TFS
Process Template Customization: Editing An Existing Work Item Type
Team Foundation Server 2010 includes process templates. Learn how to customize work item type templates for a smoother workflow.
One key customization area for Team Foundation Server 2010 is process templates, and more specifically, work item types. While the work item types available out of the box with a process template may work fine initially, over time you may find you need more fields to capture all the required information. In this column, we're going to look at the basics of how to add a new field onto an existing work item type definition.
For this scenario, we want to add a new field, called Cost Center, to the Task work item type. This will allow us to tie tasks back to specific cost centers for reporting purposes in the future.
Work item type definitions, such as Tasks and User Stories, are simply XML files. As such, there are two ways to interact with them and make changes. The first is using a text editor, such as Notepad. The second is to use the Process Editor found in the Team Foundation Power Tools (http://bit.ly/nGW2Di).
Working Directly With The XML
The first step is export the Task work item type definition (WITD) XML file so that we can make changes to it. To do that, we need to use the witadmin.exe command-line application. Open a Visual Studio Command Prompt: Start | All Programs | Microsoft Visual Studio 2010 | Visual Studio Tools and select Visual Studio Command Prompt (2010). To get started with witadmin, run the following command:
witadmin.exe /?
This will display the list of commands available for the application. The command we're concerned with is the exportwitd (for export work item type definition). To see how to use this command, run the following:
witadmin exportwitd /?
This will display the details of the export command. To export the Task WITD, we need to run the following:
Witadmin exportwitd /collection:http://localhost:8080/tfs /p:"Tailspin Toys" /n:Task /f:Task.xml
This connects to the project collection at the provided URL, and connects to a specific team project. In that team project, it looks for a work item type definition named Task, then exports that definition to a file named Task.xml.
The XML for a WITD is broken into three main sections:
• FIELDS – All the fields for a work item type, as well as the field requirements, are defined in this section.
• WORKFLOW – The various states and transitions between those states are defined in this section.
• FORM – The placement of fields on the work item form are defined in this section.
We want to add a new field to hold cost center information. To add this field to the XML file, find the </FIELDS> tag. This tag signifies the end of the fields section. Right above that tag, add the following XML code:
<FIELD name="Cost Center" refname="Contoso.CostCenter" type="String" reportable="dimension">
<HELPTEXT>Cost Center to be billed for this task</HELPTEXT>
<REQUIRED />
</FIELD>
The above XML defines a new field named Code Center. The field also has an internal reference name of Contoso.CostCenter. This is the value used internally to bind the field to a control. The reference name needs to be unique. This is a string field, and we've marked it as reportable, so that its information will be stored in the data warehouse for reporting purposes. We've also defined some help text for the field, which will appear when you hover over the field label. And finally, we've set the field to be required, meaning that it must be filled out when creating a new task. There are a variety of other options that you can set for fields, but this gives you a few examples.
However, the field isn't displayed on the form yet. To make it visible, we have to add a control to the FORM section of the XML. I want this field to display in the classification section of the form, under the Iteration control.
First, I need to find the Iteration Path control. I did a search for System.IterationPath and found the following XML declaration in the FORM section:
<Control FieldName="System.IterationPath" Type="WorkItemClassificationControl
" Label="Ite&ration" LabelPosition="Left" />
To add the cost center control, enter the following directly below the Iteration Path control XML:
<Control FieldName="Contoso.CostCenter" Type="FieldControl"
Label="Cost Center:" LabelPosition="Left" />
The above XML defines a new Field Control, bound to the Contoso.CostCenter field. The label for the control is set to "Cost Center:", and the label should be positioned to the left of the actual control.
At this point, we're ready to import the updated Task WITD back into TFS. We use the witadmin command-line application again, but this time with the importwitd command. This imports a work item type XML definition file into a team project on a Team Foundation Server. If a work item type with the same name already exists, it will overwrite the existing definition. If not, a new work item type will be created. To import the new Task work item, run the following command:
Witadmin importwitd /collection:http://localhost:8080/tfs /p:"Tailspin Toys" /f:Task.xml
This command connects to the team project collection defined by the URL, then connects to the Tailspin Toys team project. It then uploads the Task.xml WITD file to the team project, and updates the Task WITD stored there with the new field information.
We can verify this works by creating a new task work item (see Figure 1).
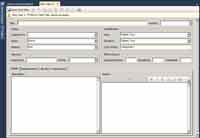
[Click on image for larger view.] |
| Figure 1. The new task work item. |
Working With The Process Editor
While working with the XML can allow you to quickly make WITD changes, there are some drawbacks. Since XML is case sensitive, mistyping something in the XML can be painful and take time to troubleshoot. As such, Microsoft has developed a GUI-based Process Editor for editing process template information, including work item type definitions. This process editor is installed when you install the Team Foundation Power Tools.
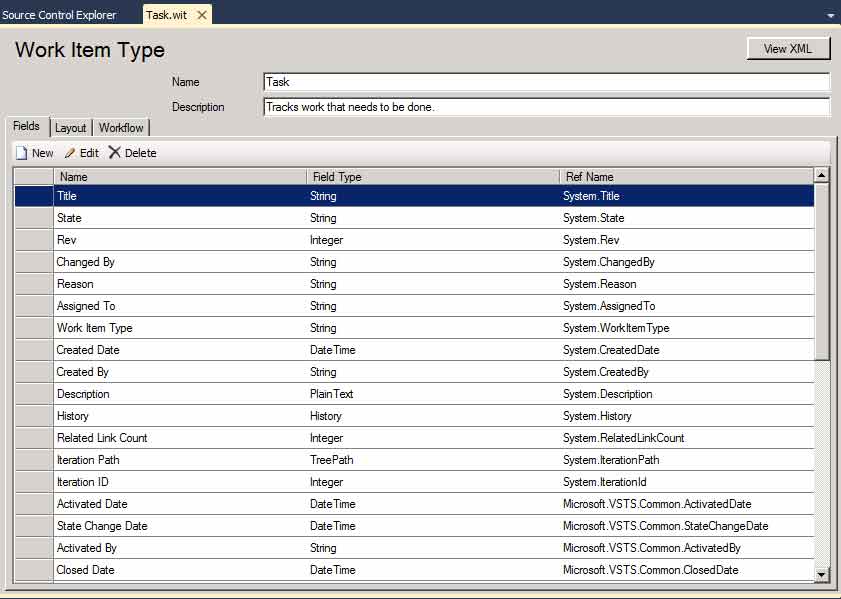
To use the process editor to export a WITD, open Visual Studio 2010 and select Tools | Process Editor | Work Item Types | Export WIT. Connect to a team project collection by selecting a TFS and a project collection. Next, select a team project, and the WITD to export. Finally, enter a file name to save the WITD to. Once the WITD has been exported, open it by selecting Tools | Process Editor | Work Item Types | Open WIT from File. The WITD opens as a tab in Visual Studio 2010 (shown in Figure 2).
[Click on image for larger view.] |
| Figure 2. The work item type definition tab in Visual Studio 2010. |
Notice the three tabs, which correspond to the three sections of the WITD: Fields, Layout and Workflow. To add a new field, select the Fields tab, then click the New button. This opens a window where you can specify field information, such as Name, Reference Name, Help Text and Reportable. This window also has a Rules tab on it, which makes it easy to add specific rules to a field. Select the Rules tab, then click the New button. This will open a window displaying all the available rules. Select the desired rule and click OK. If the rule requires additional information, you'll be prompted for it.
At this point, the Cost Center field is now displayed in the grid of fields on the Fields tab. As before, we have to add the field to the form before the user can access it. Click the Layout tab. Select the Column section above the Area and Iteration controls, right-click, and select new Control. This will create a new control section underneath the Iteration control. For the new control properties, set the Field name to be Constoso.CostCenter, to tie it back to the appropriate field, and set the label to Cost Center (Figure 3).
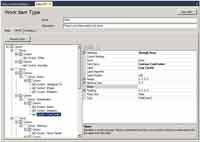
[Click on image for larger view.] |
| Figure 3. Setting new control properties. |
To import the changes back into TFS, select Tools | Process Editor | Work Item Types | Import WIT, select the WITD file and the team project, and click OK. To verify the changes are correct, create a new Task work item (Figure 1).
We've touched on the basics of WITD editing, and shown how to add a new field using both the Process Editor as well as editing the XML directly. In future columns, we'll go into more depth, looking at how to manage workflows as well as global lists.
About the Author
Mickey Gousset spends his days as a principal consultant for Infront Consulting Group. Gousset is lead author of "Professional Application Lifecycle Management with Visual Studio 2012" (Wrox, 2012) and frequents the speaker circuit singing the praises of ALM and DevOps. He also blogs at ALM Rocks!. Gousset is one of the original Team System/ALM MVPs and has held the award since 2005.