C# Corner
Async Actions in ASP.NET MVC 4
Learn how to use asynchronous controller actions in ASP.NET MVC 4 by building a simple Contacts Manager app.
The .NET 4.5 Framework introduced the new async/await asynchronous programming model. With ASP.NET MVC 4 comes the application of the async/await model to controller actions. A traditional ASP.NET MVC control action will be synchronous by nature; this means a thread in the ASP.NET Thread Pool is blocked until the action completes. Calling an asynchronous controller action will not block a thread in the thread pool.
Asynchronous actions are best when your method is I/O, network-bound, or long-running and parallelizable. Another benefit of an asynchronous action is that it can be more easily canceled by the user than a synchronous request. Note that if the controller action is CPU-bound, making the call asynchronous won't provide any benefit.
Let's see how to put them to good use in a sample application. In the sample application the user can manage a list of contacts. To get started, create a new C# ASP.NET MVC 4 Internet App in Visual Studio 2012. Next create a new Class Library named DAL. I've chosen to use Entity Framework 6 for this sample, to demonstrate its new asynchronous database operations. Install Entity Framework (EF) 6 through the NuGet Package Manager Console with this command:
PM> Install-Package EntityFramework -Pre
You can access the NuGet console by going to Tools/Library Package Manager/Package Manager Console. Be sure to configure the EF NuGet package for both your MVC 4 and DAL projects within your Visual Studio solution.
Once EF 6 is installed, set up the Contact model and context classes by first creating a new folder within your DAL project named Entities. Then create a new Contact class file within the Entities directory. Give the Contact class a long type Id property and string type FirstName, LastName, and Email properties:
using Microsoft.Build.Framework;

namespace Mvc4AsyncActionDemo.DAL.Entities
{
    public class Contact
    {
        [Required]
        public long Id { get; set; }
        public string FirstName { get; set; }
        public string LastName { get; set; }
        public string Email { get; set; }
    }
}
Then add a ContactContext class that derives from DbContext to the Entities directory. Add a Contacts property with a DbSet<Contact> data type:
using System.Data.Entity;

namespace Mvc4AsyncActionDemo.DAL.Entities
{
    public class ContactContext : DbContext
    {
        public DbSet<Contact> Contacts { get; set; }
    }
}
Now it's time to add the IContactRepository, which contains asynchronous methods to retrieve, create and delete contacts from the database through EF:
using System.Collections.Generic;
using System.Threading;
using System.Threading.Tasks;
using Mvc4AsyncActionDemo.DAL.Entities;

namespace Mvc4AsyncActionDemo.DAL.Repository
{
    public interface IContactRepository
    {
        Task<List<Contact>> GetAllAsync(CancellationToken cancellationToken=default(CancellationToken));
        Task CreateAsync(Contact contact, CancellationToken cancellationToken=default(CancellationToken));
        Task DeleteAsync(long id, CancellationToken cancellationToken=default(CancellationToken));
    }
}
As you can see, all the operations in IContactRepository return a Task or Task<T> type, which allows for integration with the async/await asynchronous programming features in C# 5. In addition, each method accepts a CancellationToken to allow for handling an asynchronous timeout.
The next step is to implement the IContactRepository interface through the concrete ContactRepository class. Add a new class file for the ContactRepository class. First I implement the GetAllAsync method, which retrieves all of the contacts as a List<Contact> through the ToListAsync extension method:
public async Task<List<Contact>> GetAllAsync(CancellationToken cancellationToken = default(CancellationToken))
 {
     using (var context = new ContactContext())
     {
         return await context.Contacts.ToListAsync(cancellationToken);
     }
 }
Then I implement the CreateAsync method that inserts a contact and commits the transaction through the SaveChangesAsync extension method:
public async Task CreateAsync(Contact contact, CancellationToken cancellationToken = default(CancellationToken))
{
    using (var context = new ContactContext())
    {
        context.Contacts.Add(contact);
        await context.SaveChangesAsync(cancellationToken);
    }
}
The DeleteAsync method locates the contact item by its id, removes it, and commits the transaction through the SaveChangesAsync extension method:
public async Task DeleteAsync(long id, CancellationToken cancellationToken = default(CancellationToken))
{
    using (var context = new ContactContext())
    {
        var contact = await context.Contacts.FindAsync(cancellationToken, id);
        context.Contacts.Remove(contact);
        await context.SaveChangesAsync(cancellationToken);
    }
}
Here's the complete ContactRepository class:
using System.Collections.Generic;
using System.Data.Entity;
using System.Threading;
using System.Threading.Tasks;
using Mvc4AsyncActionDemo.DAL.Entities;

namespace Mvc4AsyncActionDemo.DAL.Repository
{
    public class ContactRepository : IContactRepository
    {
        public async Task<List<Contact>> GetAllAsync(CancellationToken cancellationToken = default(CancellationToken))
        {
            using (var context = new ContactContext())
            {
                return await context.Contacts.ToListAsync(cancellationToken);
            }
        }

        public async Task CreateAsync(Contact contact, CancellationToken cancellationToken = default(CancellationToken))
        {
            using (var context = new ContactContext())
            {
                context.Contacts.Add(contact);
                await context.SaveChangesAsync(cancellationToken);
            }
        }

        public async Task DeleteAsync(long id, CancellationToken cancellationToken = default(CancellationToken))
        {
            using (var context = new ContactContext())
            {
                var contact = await context.Contacts.FindAsync(cancellationToken, id);
                context.Contacts.Remove(contact);
                await context.SaveChangesAsync(cancellationToken);
            }
        }
    }
}
With the data access layer complete, it's time to implement the MVC Web application. Create a new Contact folder within the Models directory in the MVC project, then create a new class named CreateContactModel with FirstName, LastName, and Email string type properties. Make the LastName field required. The completed CreateContactModel class:
using System.ComponentModel.DataAnnotations;

namespace Mvc4AsyncActionDemo.Models.Contact
{
    public class CreateContactModel
    {
        public string FirstName { get; set; }

        [Required]
        public string LastName { get; set; }
        public string Email { get; set; }
    }
}
Next, add a new class file for the ContactFormModel class to the Contact folder. The ContactFormModel class is the view model for the entire Contacts form, and contains a list of contacts as well as a new contact item to add to the list. Add a Contacts property with an IEnumerable<Contact> data type to the ContactFormModel. Then add a CreateContactModel type property named NewContact to the class:
using System.Collections.Generic;

namespace Mvc4AsyncActionDemo.Models.Contact
{
    public class ContactFormModel
    {
        public IEnumerable<DAL.Entities.Contact> Contacts { get; set; }
        public CreateContactModel NewContact { get; set; }
    }
}
Now it's time to add the ContactController class to the MVC project. Add using statements for you DAL project's Entities and Repository namespaces, as well as the Models.Contact namespace:
using Mvc4AsyncActionDemo.DAL.Entities;
using Mvc4AsyncActionDemo.DAL.Repository;
using Mvc4AsyncActionDemo.Models.Contact;
Then add a private read-only IContactRepository member variable to the class named _contactRepository:
private readonly IContactRepository _contactRepository;
Now, initialize the _contactRepository within the class constructor to a new ContactRepository instance:
public ContactController()
{
    _contactRepository = new ContactRepository();
}
Next, implement the Index action, which initializes a new contact and a list of all contacts for a new ContactFormModel that's passed to the Index view. I also add an asynchronous operation timeout, set to eight seconds, that renders the TimedOut view in case of a timeout:
[HttpGet]
 [AsyncTimeout(8000)]
 [HandleError(ExceptionType = typeof(TimeoutException), View = "TimedOut")]
 public async Task<ActionResult> Index(CancellationToken cancellationToken)
 {
     ContactFormModel model = new ContactFormModel()
         {
             NewContact = new CreateContactModel()
         };
     model.Contacts = await _contactRepository.GetAllAsync(cancellationToken);

     return View(model);
 }
As you can see, the Index controller action very closely resembles a traditional MVC controller action, except it returns a Task<ActionResult> and has the async method modified instead of only returning an ActionResult.
The next task is to add the Create controller action that handles creating a new contact from the given CreateContactModel. I first check to see if the model state is valid. If it is, I create a new contact entity and save it through the CreateAsync repository method, then redirect the user back to the Index action:
var contact = new Contact()
    {
        FirstName = model.FirstName,
        LastName = model.LastName,
        Email = model.Email
    };

await _contactRepository.CreateAsync(contact, cancellationToken);

return RedirectToAction("Index");
If the model isn't valid, I create a new form model, load its contacts, and set the new contact property to the invalid model:
ContactFormModel formModel = new ContactFormModel()
{
    NewContact = new CreateContactModel()
};
formModel.Contacts = await _contactRepository.GetAllAsync(cancellationToken);

return View("Index", formModel);
Just like the Index action, I add an asynchronous timeout attribute to the action, but with a two-second timeout instead of eight seconds:
[HttpPost]
[AsyncTimeout(2000)]
[HandleError(ExceptionType = typeof(TimeoutException), View = "TimedOut")]
public async Task<ActionResult> Create(CreateContactModel model, CancellationToken cancellationToken)
{
    if (ModelState.IsValid)
    {
        var contact = new Contact()
            {
                FirstName = model.FirstName,
                LastName = model.LastName,
                Email = model.Email
            };

        await _contactRepository.CreateAsync(contact, cancellationToken);

        return RedirectToAction("Index");
    }

    ContactFormModel formModel = new ContactFormModel()
    {
        NewContact = new CreateContactModel()
    };
    formModel.Contacts = await _contactRepository.GetAllAsync(cancellationToken);

    return View("Index", formModel);
}
The Delete action is the last controller action to implement. It takes a given id and a cancellation token, calls the DeleteAsync repository method and redirects back to the Index action. The Delete action also has a two-second asynchronous timeout setup:
[HttpGet]
[AsyncTimeout(2000)]
[HandleError(ExceptionType = typeof(TimeoutException), View = "TimedOut")]
public async Task<ActionResult> Delete(long id, CancellationToken cancellationToken)
{
    await _contactRepository.DeleteAsync(id, cancellationToken);
    return RedirectToAction("Index");
}
Here's the completed ContactController class:
using System;
using System.Threading;
using System.Threading.Tasks;
using System.Web.Mvc;
using Mvc4AsyncActionDemo.DAL.Entities;
using Mvc4AsyncActionDemo.DAL.Repository;
using Mvc4AsyncActionDemo.Models.Contact;

namespace Mvc4AsyncActionDemo.Controllers
{
    public class ContactController : Controller
    {
        private readonly IContactRepository _contactRepository;

        public ContactController()
        {
            _contactRepository = new ContactRepository();
        }

        //
        // GET: /Contact/
        [HttpGet]
        [AsyncTimeout(8000)]
        [HandleError(ExceptionType = typeof(TimeoutException), View = "TimedOut")]
        public async Task<ActionResult> Index(CancellationToken cancellationToken)
        {
            ContactFormModel model = new ContactFormModel()
                {
                    NewContact = new CreateContactModel()
                };
            model.Contacts = await _contactRepository.GetAllAsync(cancellationToken);

            return View(model);
        }


        [HttpPost]
        [AsyncTimeout(2000)]
        [HandleError(ExceptionType = typeof(TimeoutException), View = "TimedOut")]
        public async Task<ActionResult> Create(CreateContactModel model, CancellationToken cancellationToken)
        {
            if (ModelState.IsValid)
            {
                var contact = new Contact()
                    {
                        FirstName = model.FirstName,
                        LastName = model.LastName,
                        Email = model.Email
                    };

                await _contactRepository.CreateAsync(contact, cancellationToken);

                return RedirectToAction("Index");
            }

            ContactFormModel formModel = new ContactFormModel()
            {
                NewContact = new CreateContactModel()
            };
            formModel.Contacts = await _contactRepository.GetAllAsync(cancellationToken);

            return View("Index", formModel);
        }

        [HttpGet]
        [AsyncTimeout(2000)]
        [HandleError(ExceptionType = typeof(TimeoutException), View = "TimedOut")]
        public async Task<ActionResult> Delete(long id, CancellationToken cancellationToken)
        {
            await _contactRepository.DeleteAsync(id, cancellationToken);
            return RedirectToAction("Index");
        }
    }
}
The next step is to implement the Index view and _Create Razor views. Create a new Index.cshtml file under Views\Contact. Then copy this markup into the Index.cshmtl file:
@using Mvc4AsyncActionDemo.Models.Contact
@model Mvc4AsyncActionDemo.Models.Contact.ContactFormModel

@{
    ViewBag.Title = "Contacts";
}

<h2>Contacts</h2>
<div id="contactsContainer">
    <table>
        <thead>
            @if (Model.Contacts.Any())
            {
                <tr>
                    <th>First</th>
                    <th>Last</th>
                    <th>Email</th>
                    <th> </th>
                </tr>
            }
        </thead>
        <tbody>
            @if (Model.Contacts.Any())
            {
                foreach (var contact in Model.Contacts)
                {
                <tr>
                    <td>
                        @Html.DisplayFor(model => contact.FirstName)
                    </td>
                    <td>
                        @Html.DisplayFor(model => contact.LastName)
                    </td>
                    <td>
                        @Html.DisplayFor(model => contact.Email)
                    </td>
                    <td>
                        @Html.ActionLink("Delete", "Delete", new { id = contact.Id })
                    </td>
                </tr>
                }
            }
            else
            {
                <tr>
                    <td>No Contacts</td>
                </tr>
            }
        </tbody>
    </table>
    @Html.Partial("_Create", Model.NewContact)
</div>
The Index view is fairly simple; it renders a table for the Contacts property in the given ContactFormModel. The NewContact property is rendered through the _Create partial Razor view. Add a new file named _Create.cshtml to the Views\Contact form, then copy this markup into the _Create.cshtml view:
@model Mvc4AsyncActionDemo.Models.Contact.CreateContactModel

@using (Html.BeginForm("Create", "Contact"))
 {
     @Html.ValidationSummary(false)

     <fieldset>
         <legend>Contact</legend>
         @Html.EditorForModel(Model)
     </fieldset>

     <input id="btnCreateContact" type="submit" value="Create Contact"/>
 }
The next step is to configure the RouteConfig class to have the Contact controller as its default controller:
using System.Web.Mvc;
using System.Web.Routing;

namespace Mvc4AsyncActionDemo
{
    public class RouteConfig
    {
        public static void RegisterRoutes(RouteCollection routes)
        {
            routes.IgnoreRoute("{resource}.axd/{*pathInfo}");

            routes.MapRoute(
                name: "Default",
                url: "{controller}/{action}/{id}",
                defaults: new { controller = "Contact", action = "Index", id = UrlParameter.Optional }
            );
        }
    }
}
The last item to add is the TimedOut.cshml view that's rendered during an asynchronous controller action time out. Add the following markup to Views\Shared\TimedOut.cshtml:
@{
    ViewBag.Title = "Timed Out";
}

<h2>The operation has timed out, please try again.</h2>
Finally, in order to see the TimedOut view, you need to update the Web.config to support a custom error page:
<system.web>
    <customErrors mode="On"></customErrors>
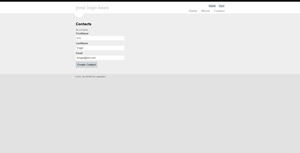
You should now be able to create a new contact, as seen in Figure 1.
 [Click on image for larger view.]
Figure 1. Creating a new Contact.
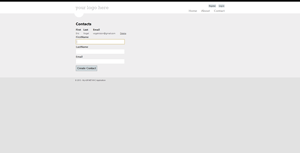
The created contact is shown in Figure 2.
 [Click on image for larger view.]
Figure 2. After adding a new Contact.
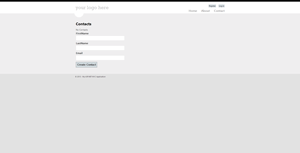
Next, delete the newly added contact, as seen in Figure 3.
 [Click on image for larger view.]
Figure 3. Deleting a Contact.
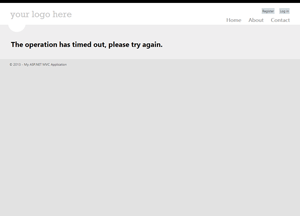
If a time out occurs, you should see the TimedOut view, shown in Figure 4.
 [Click on image for larger view.]
Figure 4. Controller action time out.
As you can see, creating an asynchronous controller action is not hard in itself. The difficulty lies in being able to make the supporting database or network calls asynchronous. In order to tackle this problem, I chose to use the pre-release EF 6. You'll want to make sure the supporting calls of your controller action are also asynchronous, to take full advantage of the asynchronous controller action's execution. Finally, be sure to measure the performance before and after making the controller action asynchronous, to ensure that the added complexity is worth the increased code maintenance cost.
About the Author
Eric Vogel is a Senior Software Developer for Red Cedar Solutions Group in Okemos, Michigan. He is the president of the Greater Lansing User Group for .NET. Eric enjoys learning about software architecture and craftsmanship, and is always looking for ways to create more robust and testable applications. Contact him at [email protected].