Practical .NET
Integrating Validation with the Entity Framework
Validation should begin as close to your database as possible: in your Entity Framework entities. Here's how you can integrate validation code into both the entities the Entity Framework generates and the ones you write.
You tell your client that you have an application with a one-second response time but, possibly, data-integrity issues. Or you tell your client that the application has a five-second response time with rock-solid data integrity. Which application gets turned on and which gets shelved? I'd bet on the one that has the longer response time but guarantees its data integrity. It's a rule: In business applications, the data matters. And the natural place to put your data integrity rules is as close to your data as possible -- in your Entity Framework entity classes.
In this column, I'll show you how to create Entity Framework entities that protect themselves from bad data, in both Model First and Code First approaches. You'll see how to use Entity Framework-specific validation frameworks and leverage the other Microsoft .NET Framework validation tools (including how to use Data Annotations in environments where they aren't directly supported). You'll also get a look at some new technology that Microsoft is starting to roll out to support declarative validation in the Entity Framework.
Validation with Model First Entity Framework
You might think that using Model First (or database-first) development will inherently restrict what you can do with your business entities, because the Entity Framework is responsible for generating your entity class code. That's not the case in the Entity Framework 4 -- you can use any of the.NET Framework validation frameworks by taking advantage of some Entity Framework-specific features.
When the Entity Framework generates code for your entities, your entities' properties include a call to a method named OnPropertyNameChanging that you can use to integrate your custom validation code. Listing 1 shows an example of the code that the Entity Framework generates for the City property on the Northwind database Customer class; you can see the call to OnCityChanging made before the property's backing field is set.
The OnCityChanging method is implemented as a partial method further down in the Entity Framework-generated code:
partial void OnCityChanging(global::System.String value);
If you create a partial class for Customer (in the same namespace as your Entity Framework model), you can replace this partial method with your own implementation. The Changing method is passed the value that will be used to set the property's backing field so you can check that value to determine its validity. The Changing methods don't provide any mechanism for reporting errors, unfortunately, so the simplest way to handle the error is to throw an exception. Listing 2 shows what happens when the City name is too long.
Avoiding Exceptions
If you don't want to throw an exception, the .NET Framework provides a standard interface (IValidatableObject) that supports returning collections of errors and a class (ValidationResult) for reporting errors. To use them, the first step (after adding the interface to your class) is to declare a collection to hold your errors:
List<ValidationResult> Errors = new List<ValidationResult>();
In your Changing event, instead of throwing an exception, create a ValidationResult object passing the error message you want to display and the properties with which the message is associated. After creating the error, add it to your errors collection:
partial void OnCityChanging(string value)
{
  ValidationResult vr = new ValidationResult(
    "City name must be less than 25 characters ",
    new string[] {"City"})
  Errors.Add(vr);
}
The IValidatableObject interface adds a method to your class that you should use to return your collection of ValidationResult objects:
public IEnumerable<ValidationResult> Validate(ValidationContext validationContext)
{
  return Errors;
}
In your application, you'll need to check the Validate method for errors and then do something with the results (some of the .NET Framework data-binding environments will do that automatically if you expose your class to them). The code in Listing 3 checks for errors. If any are present, it adds them to some listing control; if no errors are found, the code saves the changes to the model.
Using the Validate method like this provides an excellent place to put cross-property checks, because the Validate method will typically be called after all the entity's properties have been set. However, unlike throwing an exception in the Changing method, using the IValidatableObject interface allows the property to be set -- which might cause an Exception to be thrown. And if the developer using your entity doesn't check the Validate method, the property settings can make their way into the database.
Any of the .NET Framework validation interfaces -- discussed in my March Practical .NET column, "Exploiting the .NET Validation
Frameworks" -- can be applied by adding them to a partial class.
Integrating Data Annotations
You can also use Data Annotations on your entity class, even when the Entity Framework is generating your code. You need to add the MetadataType attribute to your partial class and point that attribute at a "buddy class" that applies DataAnnotations to your entity's properties. This example ties the Customer partial class to a class called CustomerWithMDT, which, in turn, applies a Data Annotation to the City property:
[System.ComponentModel.DataAnnotations.
  MetadataType(typeof(CustomerWithMDT))]
public partial class Customer
{ }
public class CustomerWithMDT
{
  [System.ComponentModel.DataAnnotations.StringLength(25,
    ErrorMessage="City name must be 25 characters or less")]
  public object City { get; set; }
}
In a data-binding environment that supports Data Annotations (for example, ASP.NET MVC or Silverlight) that's all you have to do to get your messages to the UI. In an environment that doesn't support Data Annotations (such as ASP.NET), you'll need to add some code to your property's Changing event to process the Data Annotations on your buddy class.
I use a method I've called InvokeDataAnnotations, passing the name of the property being checked and the value passed into the Changing method:
partial void OnCityChanging(string value)
{
  InvokeDataAnnotations("City", value);
}
In my InvokeDataAnnotations method, shown in Listing 4, I first retrieve the attributes on my entity class. This gives me access to the MetadataType class that points to my buddy class.
Using the reference to my buddy class, I retrieve the PropertyInfo object for the property being changed. And, once I have the property's PropertyInfo object, I can retrieve all the Data Annotations applied to the property:
PropertyInfo prop = mdt.MetadataClassType.GetProperty(Name);
var atts = prop.GetCustomAttributes(typeof(ValidationAttribute), true);
For each of the Data Annotations on the property, I can call its Validate method, passing the name of the property and the value the property is being set to. If the value isn't valid, the Validate method will raise an exception using the error messages specified on the Data Annotation:
foreach (ValidationAttribute att in atts)
{
  att.Validate(value, Name);
}
With the IValidatableObject interface, you should be adding to the Errors collection instead of raising an exception. To support that, use the annotation's IsValid method, which returns False if the value passed is bad. Then use the annotation's ErrorMessage to create a ValidationResult object to add to the Errors collection:
foreach (ValidationAttribute att in atts)
{
  if (!att.IsValid(value))
  {
    Errors.Add(new ValidationResult("errormessage", new string[] { "City" }));
  }
}
Validation with Code First Entity Framework
If you're using the Entity Framework 4.1 and Code First development, you can not only take advantage of all the Entity Framework features, but also have all the resulting error messages rolled into one package for delivery to the presentation layer. In fact, in the Code First mode, the Entity Framework provides two mechanisms for integrating validation code into your entity.
One mechanism provides an equivalent of the Validate method on each object. You implement this mechanism by overriding the ValidateEntity method when you define your DbContext class:
public class NorthwindModel: System.Data.Entity.DbContext
{
  protected override
    System.Data.Entity.Validation.DbEntityValidationResult ValidateEntity(
      System.Data.Entity.Infrastructure.DbEntityEntry entityEntry,
      System.Collections.Generic.IDictionary<Object, Object> items)
This method is called once for each entity being changed or added when the application calls the SaveChanges method on your DbContext object. The method is passed two parameters: the entity to be validated (entityEntry) and a dictionary containing additional information you might find useful in the validation method (I'll ignore that parameter for this column).
Because you can embed validation code in your entity's properties, the code you put in the ValidateEntity method should be validation code you can't include in your entity properties (for instance, code that does cross-property or cross-entity checks). Alternatively, if you're reusing your entity classes among several applications but creating your DbContext object on an application-by-application basis, you can use the ValidateEntity method for validation code that varies from one application to another.
For this example, I'm going to assume the second scenario: that in some applications, it's all right for the unit price in a sales order detail to be negative. However, in the application that this model supports, the unit price can't be negative, so the validation code that prevents that belongs in the DbContext object for this application rather than embedded in the sales order detail class.
The first thing to do is create a collection to hold any errors that the entity generates. Because the ValidateEntity method returns a DbEntityValidationResult object, the following code creates a collection (called Errors) to hold those DbEntityValidationResults:
Entity.Validation.DbEntityValidationResult Errors =
  new Entity.Validation.DbEntityValidationResult(
    entityEntry,
    new list<Entity.Validation.DbValidationError>());
A DbEntityValidationResult object has a key and a value: The key is the item being validated (the entityEntry object passed to the method) and the value is a List holding all the errors for that item (each error is a DbValidationError object). When creating the DbEntityValidationResult, pass the entityEntry object the method received and a List that can hold any DbValidationError objects you might create as you validate the entity.
Because this method will be called for any entity being added or changed, the next step is to check the entity type (if you wanted to tailor your validation code depending on whether the object is being added or modified, you could also check the entityEntry's State property). Once you determine the object's type, cast the entityEntry to the right type to simplify the validation code:
if (typeof(entityEntry.Entity) is OrderDetail)
{
  OrderDetail od;
  od = (OrderDetail) entityEntry.Entity;
You're now ready to start validating this OrderDetail object. If you find a problem, add a DbValidationError to the Errors object. A DbValidationError object accepts two parameters when it's created: the name of the property that the error is associated with and the error message itself. This code creates the error and adds it to the list of errors in the DbEntityValidationResult object:
Entity.Validation.DbValidationError dve;
if (od.UnitPrice < 0)
{
  dve = new Entity.Validation.DbValidationError(
    "UnitPrice",
    "Unit Price must be greater than zero.");
  Errors.ValidationErrors.Add(dve);
}
At the end of the code, you can determine if any problems were found by checking the length of the List of errors in DbValidationResult. If any errors are found, return them; if no errors are found, call the base method and return its value:
if (Errors.ValidationErrors.Count > 0)
{
  return Errors;
}
else
{
  return base.ValidateEntity(entityEntry, items);
}
The second mechanism means that you're not restricted to putting all your code in the ValidateEntity method. In the DbContext object, you can attach validation rules to properties while the Entity Framework is assembling your model's components. The first step here is to override the DbContext's OnModelCreating method and, using the Entity method on the modelBuilder parameter passed to the method, retrieve the entity to which you want to add validation.
Having retrieved the entity, you can call its Property method, passing a lambda expression that specifies the property you want to extend with additional validation rules. You can use any of the several extension methods that the Entity Framework provides to specify validation rules. This example, for instance, specifies that the City property have a maximum length of 25 characters:
protected override void OnModelCreating(DbModelBuilder modelBuilder)
{
  this.modelBuilder.Entity<Customer>().
    Property(c => c.City).HasMaxLength(25);
}
Accessing Validation Results
In your application's code, you can access the results of all the validation you've added through the DbContext in a variety of ways. First, if any errors are raised during the SaveChanges process, you can catch the resulting DbEntityValidationException and access its collection of EntityValidationErrors. There will be one entry in that collection for each entity that has any errors. Each entry, in turn, may have multiple errors, each listing the property name and message. In Listing 5, I just add each error message (with its property name) to some listing control.
The errors returned here will not only be the errors from your ValidateEntity method, but also any errors generated by any other validation mechanisms you've included in your entity classes (for example, any errors generated by DataAnnotations).
You can turn off the validation done during the SaveChanges process by setting the ValidateOnSaveEnabled property on the DbContext Configuration property:
dbc.Configuration.ValidateOnSaveEnabled = false;
Turning off error checking when SaveChanges is called isn't completely crazy, because you can also check for errors on all the changed objects before committing your changes. Just call the DbContext GetValidationErrors method. The method returns the same collection of ValidationResult objects that you can get through the DbEntityValidationException object:
List<System.ComponentModel.DataAnnotations.ValidationResult> vrs =
  new List<System.ComponentModel.DataAnnotations.ValidationResult>();
vrs = dbc.GetValidationErrors();
foreach(var vr in vrs)
{
  // ...display errors...
You can even validate a single entity, though you must first convert it to a DbEntityEntry. The DbContext object's Entry method will accept an instance of one of your entity classes and return the corresponding DbEntityEntry object. You can then call the DbEntityEntry GetValidationResult method to check for errors on that entity. That's what this code does before going on to display those results:
var od = (from ordl in dbc.OrderDetails
          select ordl).First();
  // ...update od...
Entity.Infrastructure.DbEntityEntry ent;
ent = dbc.Entry(od);
Entity.Validation.DbEntityValidationResult ers;
ers = ent.GetValidationResult;
foreach (var er in ers.ValidationErrors)
{
  // ...display errors...
Looking Ahead to PEM
This section is an instance of the Impractical .NET column: Talking about technology that isn't here yet. However, I'm sufficiently excited about Portable Extensibility Metadata (PEM) and what it can do to improve data integrity in Entity Framework models that I'm already starting to play with it -- not something I usually do. The goal of this section isn't to drag you through the details of PEM, but to describe what it will do for you and what it's like to use.
PEM adds declarative validation to your Entity Framework model when you're using the Entity Framework in Model First mode -- for example, whenever you use the Entity Framework designer. The technology is still plainly in a beta phase (though it's well into its second version). Currently, the technology is available as a Visual Studio add-in and only generates code for C#.
To get PEM, go to the Tools menu, select Extension Manager, pick the Online Gallery and search for Portable Metadata. Install the package, let Visual Studio reboot, and you're ready to use PEM with any new or existing Entity Framework model. Provided you don't apply PEM to an Entity Framework model, it doesn't impact the normal Entity Framework process, so you can leave PEM in place or back it out after you've finished experimenting with it. Using PEM on an existing Entity Framework model does have one side effect, but it's fixable or something you can live with (more on that later).
PEM lets you declaratively add validation rules to your Entity Framework at two levels: for individual properties on an entity or at the entity level for multiple properties.
To add validation rules at the property level, select a property in one of the model's entities in your Entity Framework designer. In the Properties window for the selected property, you'll find a new entry called Validations. Using this property, you can add multiple validation rules to a property, specifying the type of the validation rule (for instance, range), parameters for the rules (such as 0 to 100, -10 to 10) and the error message to display (see Figure 1).
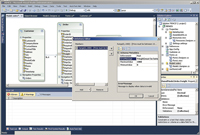
[Click on image for larger view.] |
| Figure 1. Portable Extensibility Metadata allows you to set validation rules declaratively on your Entity Framework entities through dialogs opened from the Properties window. |
You can also specify the level of enforcement: Must/Must Not and Should/Should Not. The "Not" options make it easier to design rules where you want to exclude some values rather than specify the acceptable values. The "Should" options, presumably, allow the application to override the rule or present its violation as a warning rather than a prohibition. The obvious limitation in the current version of this feature is that it supports only two types of rules: Range and Required.
To add validation rules at the entity level, select an entity (rather than one of its properties) and then, from the entity's Properties window, use its Validations property to add a validation rule. Here, you can choose from nine different rules; each rule can involve several different properties/columns. For instance, choosing the Equality rule and selecting two or more fields specifies that if any one of the properties has a value, then all of the properties must be given values.
While the Validations property makes the necessary changes to your Entity Framework model, it doesn't automatically generate the code that will enforce these rules. To have that code generated, you must right-click on the designer and select Add Code Generation Item. In the resulting Add New Item dialog, select PEM Validation Code Generator to add a new code-generator template file, with the .tt extension, to your project. The PEM template generates the same code as the standard Entity Framework template, but also throws in validation code based on the entries you made in the Validations properties. After adding the PEM Validation Code Generator template to your project, you'll find a code file nested beneath it with your generated code.
In order to prevent your Entity Framework code from being generated twice (once by the standard Entity Framework code-generator file and once by the PEM file), the PEM add-in sets the Code Generation Strategy property on your Entity Framework .edmx file to None, preventing any code from being generated directly from your model. If you've used PEM and want to get back to your original Entity Framework code, you'll want to delete the PEM .tt file and reset your Entity Framework model's Code Generation Strategy back to Default (just click anywhere in your Entity Framework designer to display the Properties window with the Code Generation Strategy property).
On the other hand, you could just use the code generated by the PEM template in your applications going forward -- it's exactly the same code that the normal Entity Framework process generates.
Though it's not related to validation, PEM also adds a Display property to the Properties window for both entities and entity properties. At the property level, the Display property lets you specify a prompt/watermark for input fields, group fields under a name, flag whether the property is editable or sortable, and provide a description of the property. At the entity level, the Display property lets you control which of the entity's properties should be displayed and set their default order.
As I said, this section is an instance of the Impractical .NET column -- this is new technology and, among other limitations, doesn't always work as expected. (I found that, on some occasions, the PEM template didn't generate any validation code, but I couldn't figure out why.)
There's also a paucity of documentation -- really, just one comprehensive blog post. And, as yet, the code that's generated doesn't integrate into the existing .NET validation frameworks. However, none of these problems are particularly hard to resolve. My guess? You're not using PEM now -- but you will be.
Even ignoring PEM, the variety of options available for the Entity Framework makes it easy to put your validation rules where they belong: As close to your data as possible.