Mono for Android
Building a Camera App in Mono for Android
The Android SDK provides the ability to use the built-in camera within your applications. Whether applying photo filters and creating the next Instagram, scanning QR codes, or simply allowing the user to share what they're seeing with friends, Android's camera API takes care of the hard work for you.
- By Greg Shackles
- 08/14/2012
What makes modern phones so powerful and useful is that they're now much more than just a phone. They come equipped with features like GPS, NFC, Web browsers, high-definition cameras and a myriad of other features outside the realm of simple telephony. As developers, this allows us the opportunity to tap into and combine these features to provide a rich user experience. Your application can know exactly where a user is, what they're seeing, what the weather's like, and any number of other things you can think of.
For many, phones have even taken over the role of being their primary camera. The quality of the cameras included with new phones can rival that of many standalone handheld digital cameras on the market.
Even better, the Android SDK provides the ability to use the built-in camera within your applications. Whether applying photo filters and creating the next Instagram, scanning QR codes, or simply allowing the user to share what they're seeing with friends, Android's camera API takes care of the hard work for you.
There are several options available to make use of the device's camera in an Android application. The rawest method is to hook directly into the camera's feed and implement the surrounding UI yourself. This can be useful if you truly need a customized experience for snapping pictures; in many cases, though, this is overkill for what you'll need.
Android has an overarching theme of keeping things DRY (Don't Repeat Yourself) with regards to creating the activities that make up an application. If another application provides an activity to perform the same task you want in your application, you can simply hook directly into that activity, tying it right into your workflow. This has the added bonus of giving the user a UI they're already familiar with, instead of reinventing the wheel every time.
This article will explore the latter option, using Android's built-in camera activity to allow the user to snap a photo. Once the photo's taken, it will switch back to the application and show the image just captured. To get started, open Visual Studio and create a new Mono for Android application named CameraDemo. Once the project's created, you can delete Activity1.cs since it's not needed; but the rest of the files can be left as-is.
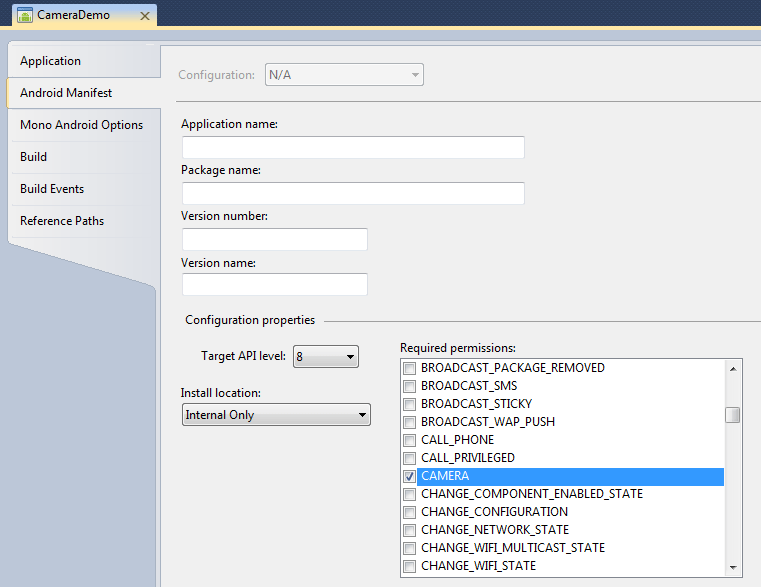
First, declare that the application requires access to the device's camera. In Android, this is done by requesting permissions required in the application's AndroidManifest.xml file. Mono for Android simplifies the creation of this file, allowing you to choose permissions directly through the Visual Studio UI and generate the entries in the manifest automatically at build time.

[Click on image for larger view.] |
| Figure 1. Adding the CAMERA permission. |
From the Project menu, select "CameraDemo Properties" and click on the Android Manifest tab. Since this is a brand-new application, by default this will display a message saying "No AndroidManifest.xml found. Click to add one." Go ahead and click it to create the file and give you access to the manifest properties. Under the box labeled "Required permissions", check the box for the CAMERA permission (see Figure 1). When a user installs your application, they're presented with the list of the requested permissions, so you generally don't want to select anything in here you don't actually need.
Now that the app has permission to use the camera, it needs a basic UI. Under the Resources/Layout folder you'll find a file named Main.axml, which will be used as the app's layout. Double-click this file, which will open it in Mono for Android's layout designer. By default, the layout will have a single button already defined, which can be reused here. Double-click this button and set its text to "Take Picture", and then in the Properties panel update its ID to TakePicture. Next, from the Toolbox panel, click and drag an ImageView element and drop it below the button. Update its ID property to Picture (see Figure 2).

[Click on image for larger view.] |
| Figure 2. Updating the ID Property to Picture. |
The interface in this sample is dead simple, so that's all you need there. Add a new activity to the project named CameraActivity, and update it to look like Listing 1.
In the activity's OnCreate method, you set the layout to be Main.axml. Once the layout is set, find the TakePicture button from inside that layout and assign a handler for its Click event, which hasn't been defined yet. As the name implies, this event will be fired when the user clicks (or taps) on the button. Next, implement the takePicture() method:
private void takePicture(object sender, EventArgs e)
    {
        var intent = new Intent(MediaStore.ActionImageCapture);

        StartActivityForResult(intent, TakePictureRequestCode);
    }
Intents are messages sent to the system to tell it what you'd like to do next. These messages can be explicit, specifically targeting what you want the message to do, or implicit, as seen here. In this case, the method creates a message saying it wants to capture an image, and leaves it up to Android to properly route that to an activity that can handle it. Activities are able to register which intent actions they can respond to; this means that if Android finds multiple activities that can respond to a particular request, it can display a list to the user, allowing them to decide which to use. By default, the capture image action is handled by Android's built-in camera activity.

[Click on image for larger view.] |
| Figure 3. The camera app UI. |
The StartActivityForResult() method used here says to launch the activity to perform the task, but return to the current activity with the results once the task is complete. In this case, it means it will return to the current activity once a photo has been taken. In order to handle when the result is returned, you can override the activity's OnActivityResult() method:
protected override void OnActivityResult(int requestCode, Result resultCode, Intent data)
    {
        base.OnActivityResult(requestCode, resultCode, data);

        if (requestCode == TakePictureRequestCode)
        {
	    var picture = FindViewById<ImageView>(Resource.Id.Picture);

           using (var thumbnail = (Bitmap)data.Extras.Get("data"))
           {
               picture.SetImageBitmap(thumbnail);
           }
        }
    }
When the result is returned to CameraActivity, it includes a field in its list of "extras", which contains a bitmap thumbnail of the captured image. To keep things simple in the first version, the app will simply display that thumbnail in the UI. One thing to note here is the using block around allocating memory for the image.
Resources are a precious commodity in mobile devices, so you should be careful to clean up large objects once you no longer need a reference to them. In many cases you can rely on the garbage collector to take care of this for you, but when dealing with large objects such as images or music files, it can be useful to help out the garbage collector by disposing of things when you're done with them. In Mono for Android, all objects that inherit from Java.Lang.Object also implement the IDisposable interface, allowing you to use that pattern as seen here.
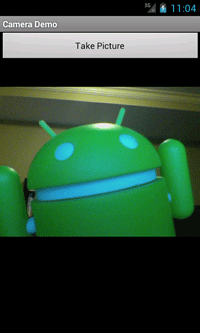
At this point the application is fully functional, so you can start it up. The initial interface should look like Figure 3. Clicking the Take Picture button will pull up Android's camera application, allowing you to take a photo and return to the sample application (see Figure 4). You have now successfully integrated with the device's camera from your application, but in most cases you'll probably want to do something a bit more useful than displaying a small thumbnail of the picture.

[Click on image for larger view.] |
| Figure 4. Displaying the thumbnail image. |
To demonstrate that, you'll extend the application to save the full picture to the device's external storage (such as an SD card), and then use it to display a larger image in the UI. In addition, you'll also add the picture to the device's gallery so that it shows up with any other pictures the user has taken in other apps.
First, the application needs to request permission to write to external storage. You can do this in exactly the same way you added the CAMERA permission earlier, except this time check the box for WRITE_EXTERNAL_STORAGE. Next, add a private member variable to the CameraActivity class to store the location of the new picture file:
private Android.Net.Uri _pictureFileUri;
Now the takePicture() method should be updated to specify where to write the picture to and pass that along to the camera application:
private void takePicture (object sender, EventArgs e)
	{
		var intent = new Intent(MediaStore.ActionImageCapture);

		var pictureFile = new Java.IO.File(
		    Android.OS.Environment.GetExternalStoragePublicDirectory(
                    Android.OS.Environment.DirectoryPictures),
		    Guid.NewGuid().ToString() + ".png");
		_pictureFileUri = Android.Net.Uri.FromFile(pictureFile);

		intent.PutExtra(MediaStore.ExtraOutput, _pictureFileUri);

		StartActivityForResult(intent, TakePictureRequestCode);
	}
When the camera application sees the file path stored in this way, it knows to save the captured photo to that location. File paths can vary a lot across different Android versions and devices, so you never want to use explicit paths in your applications. The GetExternalStoragePublicDirectory() method is used to get the proper external storage path, in this case specifically to the pictures directory inside the device's external storage. That path is then saved so that it can be read out and displayed once the picture is taken later on. Finally, update OnActivityResult(), as shown in Listing 2.

[Click on image for larger view.] |
| Figure 5. The larger picture. |
Using the URI stored earlier containing the path to the new file, the method loads up the bitmap and displays it in the UI, which should appear much larger than the thumbnail seen earlier (see Figure 5).
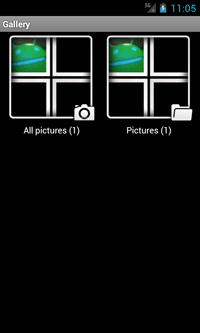
Following that, an intent is constructed to broadcast a message saying that a new picture was added to the device, and that it should be scanned into the gallery. Broadcasts are global messages sent throughout the entire system to any application that registers a broadcast receiver for that particular type of message. Android's Gallery application listens for this type of broadcast so that it knows when to add a new picture (see Figure 6).

[Click on image for larger view.] |
| Figure 6. Adding a new picture. |
It's nice to integrate the device's camera into your application without having to write very much code along the way. In addition, you also saw how to save that image to the file system, as well as add it to the device's picture gallery, making it a first class picture-taking application on the device. There's plenty more that can be done with the camera API, but hopefully this helps you get started taking advantage of the device's camera in your applications.