Cross Platform C#
Take Advantage of iOS 7's New Features
Apple's latest mobile operating system is chock full of developer goodies. Learn about some of the best ones, and how to build them with C# and Xamarin.
On Sept. 18, Apple formally began distributing iOS 7 to users. Within one month, iOS 7 was running on 69.3 percent of iOS devices, according to app monitoring company Fiksu. On Sept. 20, Apple began selling the new iPhone 5s and 5c. While excitement surrounds the release of any new operating system, Apple creates additional excitement for developers, due to the rapid uptake of each new version of iOS.
With iOS 7, Apple has provided a number of new features worth getting to know. Since this column is called "Cross-Platform C#," the question of the length of time it takes Xamarin to provide support for new features comes up frequently. There's good news on that front, because Xamarin has provided same-day support for the latest version of iOS. This article will take a look at some of these new iOS features.
Controls
Controls have the same functionality as in iOS 6. A UIButton is still a UIButton, a UIPicker is still a UIPicker, and a UITextbox is still a UITextBox. The biggest difference in controls is the general look. For example, with iOS 6 and earlier, controls typically had a border. From a programming standpoint, there isn't much difference between the controls; the only one I've uncovered is when programmatically creating controls.
Previously, UIButtons were created with the type UIButtonType.RoundedRect, like this:
var btn = UIButton.FromType(UIButtonType.RoundedRect);
With iOS 7, the UIButton is created like this:
var btn = UIButton.FromType(UIButtonType.System);
Thankfully, the UIButtonType.System maps to the UIButtonType.RoundedRect at this time.
View Transitions
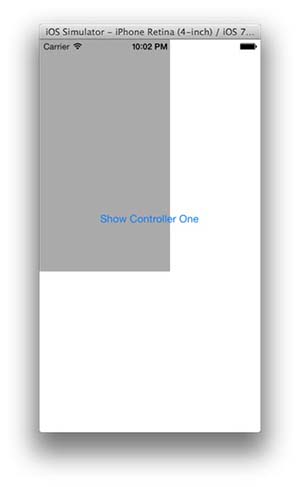
With iOS 7, by default, ViewControllers are loaded up from the bottom of the screen when a call to PresentViewController is made. When a ViewController is unloaded via a call to DismissViewController, the ViewController will be moved down and removed from the screen. This goes with the general view of information being placed on the screen as well as removed. There is also a series of customizations that can be performed. Figure 1 shows a transition occurring between two controllers in the iOS simulator.
 [Click on image for larger view.]
Figure 1. A transition occurring between two controllers in the iOS simulator.
[Click on image for larger view.]
Figure 1. A transition occurring between two controllers in the iOS simulator.
Let's take a look at the sample code for this. Here's the code to load a new ViewController:
controllerTwo = new ControllerTwo (); showTwo.Hidden = true; // Required controllerTwo.ModalPresentationStyle =
  UIModalPresentationStyle.Custom; transitioningDelegate = new TransitioningDelegate (); controllerTwo.TransitioningDelegate = transitioningDelegate; this.PresentViewController (controllerTwo, true, null);
In this example, there are two items to notice:
- Once the ViewController is created, the ModalPresentation is set to value UIModalPresentationStyle.Custom.
- The property TranstioningDelegate is set to a custom class shown in the next segment. This is a common pattern in iOS; a class is instantiated that handles a series of events. In this case, the event is the transition between two ViewControllers.
The next step is to look at the code that makes up the transition delegate:
public class CustomTransitionAnimator :
  UIViewControllerAnimatedTransitioning {   public CustomTransitionAnimator ()   {   }    public override double TransitionDuration (
    IUIViewControllerContextTransitioning transitionContext)   {     return 5.0f;   }    public override void AnimateTransition (
    IUIViewControllerContextTransitioning transitionContext)   {     var inView = transitionContext.ContainerView;     var toVC = transitionContext.GetViewControllerForKey (
      UITransitionContext.ToViewControllerKey);     var toView = toVC.View;      inView.AddSubview (toView);      var frame = toView.Frame;     toView.Frame = RectangleF.Empty;      UIView.Animate (TransitionDuration (transitionContext), () => {       toView.Frame = new RectangleF (0, 0, frame.Width, frame.Height);       }, () => { transitionContext.CompleteTransition (true);     });   } }  public class TransitioningDelegate :
  UIViewControllerTransitioningDelegate {   CustomTransitionAnimator animator;    public override IUIViewControllerAnimatedTransitioning
    PresentingController (UIViewController presented,
    UIViewController presenting, UIViewController source)   {     animator = new CustomTransitionAnimator ();     return animator;   } }
The important things in this code:
- The transitioning delegate will inherit from UIViewControllerTransitioningDelegate. Within the class, the PresentingController method is overridden.
- The CustomTransitionAnimator class is created. It will inherit from UIViewControllerAnimatedTransitioning.
- Two methods will need to be implemented:
- AnimateTransition, which handles the transition view. In this example, the transition will go from the top left to the bottom right as it fills up the screen.
- TransitionDuration, which handles the amount of time, in seconds, the transition will take.
Maps
One major feature of iOS 6 was the inclusion of Apple Maps. While it had problems initially, they've been ironed out. And iOS 7 has several new features for maps:
- Display of buildings
- A three-dimensional look, using a camera
Here's an example:
MapIt.ShowsBuildings = true; MapIt.PitchEnabled = true; var camera = MKMapCamera.CameraLookingAtCenterCoordinate (
  target, viewPoint, 500.0); MapIt.Camera = camera;
The code does the following:
- The map is instructed to display the buildings within its view port. This provides users with better location context, an improvement over a flat display of streets (or satellite view).
- A camera object is used to provide general context and display of a location. Users can think of this as a "bird's-eye view" of what's below.
The output of the code is shown in Figure 2 when running on an iPhone 5 with iOS 7.03.
 [Click on image for larger view.]
Figure 2. New features of Maps in iOS 7.
[Click on image for larger view.]
Figure 2. New features of Maps in iOS 7.
Text-to-Speech
Speech has been an interest all my life, and in iOS 7 it can do even more to help blind or disabled users. Here's some sample code:
var speechSynthesizer = new AVSpeechSynthesizer (); var speechUtterance = new AVSpeechUtterance ("Might I have a spot of tea?"); speechUtterance.Rate = AVSpeechUtterance.MaximumSpeechRate / 3; speechUtterance.Voice =
AVSpeechSynthesisVoice.FromLanguage ("en-GB"); speechSynthesizer.SpeakUtterance (speechUtterance);
This code does the following:
- Some sample text is placed into an AVSpeechUtuterance object.
- The rate for speech is set. I found that using the default rate resulted in speech that's a little too fast, so I slowed it down.
- The language for the speech must be set: English in Great Britain for this example.
Once the code is tied to a button, touching the button results in the text being read.
Scratching the Surface
With iOS 7for the iPhone and iPad, Apple's provided a great new set of features and APIs for developers to take advantage of, and this article has just scratched the surface. Some other new features you may want to check out include:
- SpriteKit, which provides a game framework
- iBeacons, which provides more detailed connectivity
Author Note: Thanks to Craig Dunn, Mike Bluestein, Larry O'Brien, Chris Hardy and other folks at Xamarin for their help with this article.
About the Author
Wallace (Wally) B. McClure has authored books on iPhone programming with Mono/Monotouch, Android programming with Mono for Android, application architecture, ADO.NET, SQL Server and AJAX. He's a Microsoft MVP, an ASPInsider and a partner at Scalable Development Inc. He maintains a blog, and can be followed on Twitter.