In-Depth
Using Knockout Custom Binding Handlers
Knockout custom binding handlers can help simplify integration with third-party JavaScript libraries. Here's how.
A few months ago, I wrote an article on using the JavaScript library Knockout. One thing I didn't cover was custom bindings. This is a feature of Knockout that can make integrating with other JavaScript libraries a breeze.
Knockout Bindings
Knockout comes loaded with bindings to handle all sorts of things:
- Text and appearance ("text," "visible," "css" and so on)
- Control flow ("foreach," "if" and so on)
- Form fields ("value," "options," "checked" and so on)
- Events ("click," "hasFocus" and so on)
But sometimes that isn't enough. Sometimes, I've got a third-party JavaScript library with which I need to integrate. Since using Knockout, I've become spoiled and I no longer write a lot of code to manually update controls and register event handlers. When I move away from the standard HTML controls and start using third-party libraries, I'm back to writing UI update code again. Yuck! That's where writing custom binding handlers comes in. I can tell Knockout how to bind my view model to these other libraries.
Google Charts
You might not be aware, but Google has a really nice set of Visualization APIs for creating charts available to Web developers. It's a very easy way to add some simple (as well as not-so-simple) charts and graphs to your Web application. For this sample, I'm going to use some gauges to display the current time (hours, minutes and seconds), as shown in Figure 1.
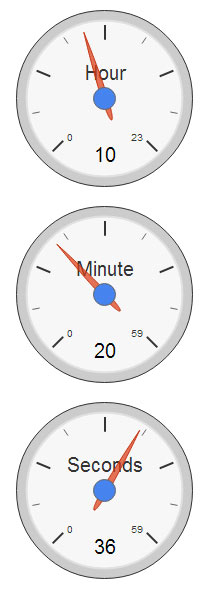 Figure 1. Sample Google Gauge Chart
I'm going to start off by doing this manually with straight JavaScript. Then I'll refactor into a custom Knockout binding for easier reuse and better separation of my presentation and logic.
Initializing the Google Visualization API starts with loading the necessary packages. I'm only using the gauges, so I only need to load the "gauge" package:
<script type='text/javascript' src='https://www.google.com/jsapi'></script>
<script type="text/javascript">
  google.load('visualization', '1', {packages:['gauge']});
</script>
Google charts are rendered in a standard <div> tag. The API will use the most optimal method for rendering based on the browser. More modern HTML5-enabled browsers will use SVG, while older IE browsers will use VML. I just define the <div> tags and let the Visualization API do the hard work:
<div id="hours"></div>
<div id="minutes"></div>
<div id="seconds"></div>
Using the jQuery document.ready handler, I'll create the three gauges for each of the <div> tags:
hourChart = new google.visualization.Gauge($('#hours')[0]);
minuteChart = new google.visualization.Gauge($('#minutes')[0]);
secondChart = new google.visualization.Gauge($('#seconds')[0]);
I also initialized some options to be used when rendering each gauge. They should be self-explanatory (Note: See the Google Visualization API documentation for a complete set of options):
var hourOptions = { min: 0, max: 23, width: 200, height: 200 };
var minuteOptions = { min: 0, max: 59, width: 200, height: 200 };
var secondOptions = {min: 0, max: 59, width: 200, height: 200, animation: { duration: 0 } };
Note that I set the animation.duration value to zero for the seconds gauge. By default, the charts have a nice, smooth animation to them as their values are updated. For something that represents a ticking seconds hand, I wanted it to have a nice "snap." By setting the animation duration to zero, the gauge updates immediately.
Now I need to get this running in a continuous loop that will update every second (I'll cover the 'updateCharts' function later):
loop();

function loop() {
  updateCharts();
  window.setTimeout(loop, 1000);
}
The Visualization API defines a DataTable to hold the data used for many of its charts. There are different ways to construct a DataTable; for this example, I've used the utility method arrayToDataTable. This takes an array of arrays and creates a row/column-based DataTable. Because I need to create a DataTable for each gauge (hour, minute, second), I create a utility method for generating a DataTable:
function createDataTable(caption, value) {
  return google.visualization.arrayToDataTable([
    ['Label', 'Value'],
    [caption, value]
  ]);
}
Finally, it's time to put all of this together and display my gauges:
function updateCharts() {
  var d = new Date();

  hourChart.draw(createDataTable(
    'Hours', d.getHours()), hourOptions);
  minuteChart.draw(createDataTable(
    'Minutes', d.getMinutes()), minuteOptions);
  secondChart.draw(createDataTable(
    'Seconds', d.getSeconds()), secondOptions);
}
As you can see, this isn't terribly difficult, but there's a lot of code to write, considering I just want to display three gauges, each with a single value. What I would prefer is to simply have three Knockout observables and bind them directly to a <div> that will render as a gauge.
Knockout Custom Bindings
Writing a custom binding is pretty straightforward. All I have to do is add a subproperty to ko.bindingHandlers:
ko.bindingHandlers.myCustomBindingName = {
  init: function(…),
  update: function(…)
};
Note that there are only two calls to handle:
- init: This is called when the biding is first applied to a DOM element. This is where you would perform one-time initialization such as registering an event handler to update your observable when the DOM element changes.
- update: This is called once when the binding is first applied, and again whenever your observable changes and the DOM element needs to be updated.
Some binding handlers may only need one or the other (you don't have to implement both). For example, if I was creating a binding for a read-only control, I'd only need to handle the update callback and change the control whenever my observable changed.
My gauge binding will need to handle both the init and the update callbacks. Here's the signature for the init callback:
init: function (element, valueAccessor, allBindings, viewModel, bindingContext) { }
The parameters:
In the previous sample, allBindings.get('valueUpdate') will return the value 'afterkeydown.'
- viewModel: This is an old parameter from pre-Knockout 3.x. The data for this value is now exposed as a property on the bindingContext parameter.
- bindingContext: This object defines the context under which binding is currently available for the DOM element. This object also includes special properties such as "$parent" and "$root" that can be used to access data bound against the ancestors of the bindingContext.
For convenience, the parameters for the update callback contain the same set of parameters. Once you're familiar with one, you're familiar with both!
I'm going to start by writing my data-bind attribute and then creating the custom binding to support that:
<div data-bind="gauge: hour, caption: 'Hour', gaugeOptions: { min: 0, max: 23 }" ></div>
Only three binding values:
- gauge: This binds to the observable that defines the value for the gauge.
- caption: The caption to be displayed on the gauge.
- gaugeOptions: The gauge options passed directly into the Visualization API.
Adding this to Knockout is simply a matter of adding a gauge property to ko.bindingHandlers:
ko.bindingHandlers.gauge = {
  init: function(…) {},
  update: function(…) {}
};
On to the binding!
The Init Callback
Handling the init callback is pretty simple, except that I need to create a chart object and hold on to that reference for the update callback so I can draw on it. Luckily, Knockout includes a utility function to store and retrieve data on the element. This allows me to create the chart and save it with the <div> tag to which I'm binding:
init: function (element, valueAccessor, allBindings, viewModel, bindingContext) {
  var chart = new google.visualization.Gauge(element);
  ko.utils.domData.set(element, 'chart', chart);
}
That's all I need to do to initialize my binding.
The Update Callback
My update code will handle getting the updated model value and re-drawing the gauge. I start with grabbing the value to bind, as well as the caption. If no caption was defined on the binding, I default to Caption:
update: function (element, valueAccessor, allBindings, viewModel, bindingContext) {
  var value = ko.unwrap(valueAccessor());
  var caption = allBindings.get('caption') || 'Caption';
}
Note how I use the ko.unwrap utility method to get the actual value of whatever is bound to my gauge binding.
When it comes to the gaugeOptions value, I want to have a default width and height. The Visualization API has documented defaults, but I found a small quirk: if I don't define a width and height explicitly, my gauge seems to shrink a little on each redraw. I didn't dig in to see if this was an issue in my code or a bug in the API, but providing a set width and height fixed the issue, so I defined a default of 200 for width and height inside my binding:
var options = allBindings.get('gaugeOptions') || {};
options.width = options.width || 200;
options.height = options.height || 200;
Notice that I don't assume a gaugeOptions was passed in, and I don't overwrite a width or height value if it's provided.
Now I just need to build the DataTable with the caption and the value:
var data = google.visualization.arrayToDataTable([
  ['Label', 'Value'],
  [caption, value]
]);
Finally, it's time to draw the chart. I grab the chart object that I created during the init and update it with new data:
var chart = ko.utils.domData.get(element, 'chart');
chart.draw(data, options);
The complete update callback is shown in Listing 1.
Listing 1: The Complete Update Callback
update: function (element, valueAccessor, allBindings, viewModel, bindingContext) {
  var value = ko.unwrap(valueAccessor());
  var caption = allBindings.get('caption') || 'Caption';

  var options = allBindings.get('gaugeOptions') || {};
  options.width = options.width || 200;
  options.height = options.height || 200;

  var data = google.visualization.arrayToDataTable([
    ['Label', 'Value'],
    [caption, value]
  ]);
  var chart = ko.utils.domData.get(element, 'chart');
  chart.draw(data, options);
}
Using the Gauge Binding
I start refactoring my original example by moving the logic of what I want to do into a simple view model, as shown in Listing 2. It's very simple, clean and easy to understand.
Listing 2: Simple View Model
function GaugeViewModel() {
  var me = this;

  me.hour = ko.observable(0);
  me.minute = ko.observable(0);
  me.second = ko.observable(0);

  me.update = function() {
    var d = me.getDate();
    me.hour(d.getHours());
    me.minute(d.getMinutes());
    me.second(d.getSeconds());
  };

  me.loop = function() {
    window.setTimeout(function() {
      me.update();
      me.loop();
    }, 1000);
  };

  me.update();
}

GaugeViewModel.prototype.getDate = function() {
  return new Date();
};
I can also write some Jasmine specs to make sure my update function actually updates my observables properly (that's why I added getDate to the prototype -- it allows me to mock it out with Jasmine by spying on GaugeViewModel.prototype!).
I'll still need to load the Visualization APIs (and add a reference to the knockout library), but my document.ready handler is greatly simplified:
$(function() {
  var vm = new GaugeViewModel();
  ko.applyBindings(vm);
  vm.loop();
});
Finally, here's my HTML to display the gauges:
<div data-bind="gauge: hour, caption: 'Hour', gaugeOptions: { min: 0, max: 23 }" ></div>
<div data-bind="gauge: minute, caption: 'Minute', gaugeOptions: { min: 0, max: 59 }" ></div>
<div data-bind="gauge: second, caption: 'Seconds', gaugeOptions: { min: 0, max: 59,
  animation: { duration: 0 } }" ></div>
Now I have clean HTML and a standalone view model for which I've written tests. It contains a few simple Jasmine specs (tests) for the GaugeViewModel. (See the "tests" folder in the sample code for this article.)
Augment Existing Bindings
Custom bindings can also be used to do something as simple as augmenting an existing binding.
I have some XML data I want to display to the user. I could wrap the data in a <pre> tag and bind it using the built-in Knockout text binding, but I'd like some basic highlighting of the XML for readability. Fortunately, there's a nice library called "highlightjs" that supports a ton of highlighting options. I just need to create a custom binding so I don't have to manually call the highlightjs library to perform its magic.
In this case, I want Knockout to do its regular text binding, but then I want to add some additional code -- specifically, I need to set the class attribute with the style highlighting I want and then call the highlightjs library. Because all of the Knockout binding handlers are properties of the ko.bindingHandlers object (not just custom ones), I can call the text binding directly.
I'm going to start by defining what my data-bind attribute should look like:
<pre>
  <code data-bind="hljs: xmlData, style: 'xml'"></code>
</pre>
There's no need for an init method on this custom binding handler. I just need to apply the styling whenever my observable changes. So I create a custom binding handler that has the update method defined:
ko.bindingHandlers.hljs = {
  update: function(element, valueAccessor, allBindings, viewModel, bindingContext) {
  }
};
The first thing I do is use the existing Knockout text binding to let it perform the update of the DOM element:
ko.bindingHandlers.text.update(element, valueAccessor, allBindings,
  viewModel, bindingContext);
Now I can add my custom handling. I grab the style setting included in the data-bind attribute, clear out any existing values and apply the new setting:
if( allBindings.has('style')) {
  var style = allBindings.get('style');
  $(element).removeAttr('class');
  $(element).addClass(style);
}
Finally, I perform the highlighting by calling the highlightjs library:
hljs.highlightBlock(element);
The complete binding shown in Listing 3 is quite simple, yet gives me a lot of flexibility.
Listing 3: The Complete Knockout Binding Handler
ko.bindingHandlers.hljs = {
  update: function(element, valueAccessor, allBindings, viewModel, bindingContext) {
    ko.bindingHandlers.text.update(element, valueAccessor, allBindings,
      viewModel, bindingContext);
    if( allBindings.has('style')) {
      var style = allBindings.get('style');
      $(element).removeAttr('class');
      $(element).addClass(style);
    }
    hljs.highlightBlock(element);
  }
};
Now I can apply highlighting to any observable, and changes to that observable will be automatically processed with new syntax highlighting.
Sliding with Knockout
My last example shows how I can use the init method of a custom binding to handle two-way updating of a third-party control.
This time I've got a jQuery slider. Instead of registering event handlers and manually updating the slider, I want to simply bind the slider to an observable. In this case, I'll actually have more code during the initialization of my binding handler than in the actual update.
Again, I'll start with my HTML code and what I want the data-bind attribute to look like:
<div data-bind="slider: volume, updateDuringSlide: true,
  sliderOptions: { min: 0, max: 50 }"></div>
In this case, I'm binding to a view model property called "volume." I add a flag called "updateDuringSlide." This is used to define when the slider updates the observable: either during the slide (while the user is actively moving the slider), or after the slide is complete (when the user releases the mouse button). Finally, I define sliderOptions as the set of options that can be used with the jQuery slider.
My init function starts by initializing the jQuery slider with the options defined by the user:
ko.bindingHandlers.slider = {
  init: function (element, valueAccessor, allBindings) {
    var options = allBindings.get('sliderOptions') || {};
    $(element).slider(options);
  }
};
At this point, the UI work is done: I could stop here and have a fully functional jQuery slider, but I want updates to the slider to be reflected in the observable to which it's bound. This is accomplished by registering an event handler and updating the observable. I subscribe to different events depending on the value of the updateDuringSlide option:
var updateDuringSlide = allBindings.get('updateDuringSlide') || false;
if( updateDuringSlide) {
  $(element).on('slide', function (event, ui) {
    valueAccessor()(ui.value);
  })
} else {
  $(element).on('slidechange', function (event, ui) {
    valueAccessor()(ui.value);
  })
}
Notice the call to update the observable. I call the valueAccessor method, which returns the observable. And, if you remember from my August 2013 Knockout article, observables are themselves functions. So I execute that function and pass the slider value, thus updating the observable!
All that's left is updating the slider if the observable changes:
update: function (element, valueAccessor) {
  $(element).slider('value', ko.unwrap(valueAccessor()));
}
You'll notice in the sample code for the slider, not only did I bind the volume property of the view model to the slider, I also bound it to a textbox. When you move the slider, the textbox is updated. Likewise, if you enter a value in the textbox, the slider is updated! All of this functionality is accomplished with a simple custom binding, as shown in Listing 4.
Listing 4: Simple Custom Binding for Slider Functionality
ko.bindingHandlers.slider = {
  init: function (element, valueAccessor, allBindings) {
    var options = allBindings.get('sliderOptions') || {};
    $(element).slider(options);

    var updateDuringSlide = allBindings.get('updateDuringSlide') || false;
    if( updateDuringSlide) {
      $(element).on('slide', function (event, ui) {
        valueAccessor()(ui.value);
      })
    } else {
      $(element).on('slidechange', function (event, ui) {
        valueAccessor()(ui.value);
      })
    }
  },
  update: function (element, valueAccessor) {
    $(element).slider('value', ko.unwrap(valueAccessor()));
  }
};
A Better Model
You've seen that Knockout custom bindings aren't something reserved only for advanced cases; nor are they complicated to write. I think anytime you're using Knockout and start writing DOM manipulation code inside your view model, you should reconsider and opt for writing a custom binding handler. They can save you a lot of time and, once you've written one, can be reused across projects.