C# Corner
Entity Framework Core Migrations
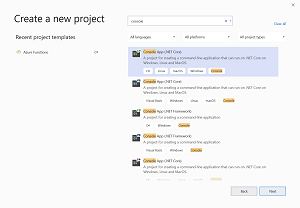
Today I'm going to cover how to do Entity Framework Core migrations in a .NET Core application through the command line and in code. To get started create a new .NET Core Console Application as seen in Figure 1.
 [Click on image for larger view.] Figure 1: Create a New .NET Core Console App
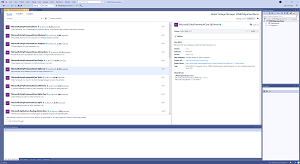
Next install the SQL Server Entity Framework Core NuGet package as seen in Figure 2.
 [Click on image for larger view.] Figure 2: Install EF Core Tools NuGet Package
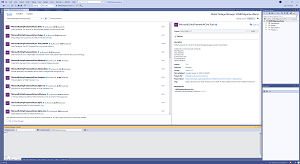
We also need to install the Microsoft.EntityFrameworkCore.Tools NuGet package as seen in Figure 3.
 [Click on image for larger view.] Figure 3: Install EF Core SQL NuGet Package
Now create a new folder in your project named Models. Then create a Person class under the Models folder as seen in Listing 1.
Listing 1: Person Model Class
using System;
using System.Collections.Generic;
using System.Text;

namespace VSMEFMigrationsDemo.Models
{
  public class Person
  {
    public int Id { get; set; }
    public string FirstName { get; set; }
    public string LastName { get; set; }
  }
}
Next we create the AppContext class that is a custom DbContext that will allow access to Person records as seen in Listing 2.
Listing 2: AppContext Class
using Microsoft.EntityFrameworkCore;
using VSMEFMigrationsDemo.Models;

namespace VSMEFMigrationsDemo
{
  public class AppContext : DbContext
  {
    private const string ConnectionString = "Server=(localdb)\\mssqllocaldb;Database=EFCore;Trusted_Connection=True;";

    protected override void OnConfiguring(DbContextOptionsBuilder optionsBuilder)
    {
      optionsBuilder.UseSqlServer(ConnectionString);
    }

    public DbSet<Person> Persons { get; set; }
  }
}
Now it is time to create our initial migration through the NuGet Package Manager Console. Enter the command "Add-Migration InitialCreate" without the quotes. Now you can update the database by either running "Update-Database" from the NuGet Package Manager Console or by running context.Database.Migrate(). To use the later update your Program.cs class to look like Listing 3.
Listing 3: Database Migration in Code
using System;
using Microsoft.EntityFrameworkCore;

namespace VSMEFMigrationsDemo
{
  class Program
  {
    static void Main(string[] args)
    {
      using (var context = new AppContext())
      {
        context.Database.Migrate();
        Console.WriteLine("Database has been migrated");
      }

      Console.ReadLine();
    }
  }
}
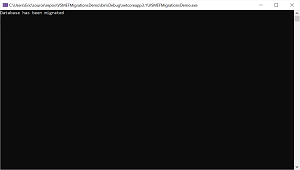
The application should run successfully and you should see "Database has been migrated" output through the console as seen in Figure 4.
 [Click on image for larger view.] Figure 4: Running the First Migration
Now you can add make tweaks to your model classes run "Add-Migration migration_name" from the NuGet Package Manager and the app will automatically update the database when it runs. To test this out let's add an Email field to the Person model then add a migration and run the app. Your update Person class should look like Listing 4 now.
Listing 4: Updated Person Class
using System;
using System.Collections.Generic;
using System.Text;

namespace VSMEFMigrationsDemo.Models
{
  public class Person
  {
    public int Id { get; set; }
    public string FirstName { get; set; }
    public string LastName { get; set; }
    public string Email { get; set; }
  }
}
Then create a new migration by running "Add-Migration PersonAddedEmail" from the NuGet Package Manger. Now we'll update the program to test out the change. Update the Program class to look like Listing 5.
Listing 5: Updated Program to Test Migration
using System;
using System.Linq;
using Microsoft.EntityFrameworkCore;
using VSMEFMigrationsDemo.Models;

namespace VSMEFMigrationsDemo
{
  class Program
  {
    static void Main(string[] args)
    {
      using (var context = new AppContext())
      {
        context.Database.Migrate();
        Console.WriteLine("Database has been migrated");

        var newPerson = new Person()
        {
          Email = "[email protected]",
          FirstName = "Eric",
          LastName = "Vogel"
        };
        context.Persons.Add(newPerson);

        context.SaveChanges();

        var existingPerson = context.Persons.Single(x => x.Id == 1);
        Console.WriteLine("Email was set to: " + existingPerson.Email);
      }

      Console.ReadLine();
    }
  }
}
Run the program and you will see that the Email field was indeed added to the Persons table and can be accessed as seen in Figure 5.
 [Click on image for larger view.] Figure 5: Completed Demo Program
Today I've shown you how to create a simple .NET Core application that can update its own database at run-time. As you can see this is very powerful. If you prefer to run the migration ahead of time you can script it through Visual Studio or the command line (run "dotnet ef database update"). Furthermore if your DBAs insist you can generate a SQL script for them to run by running either "Script-Migration" from the NuGet Package Manager Console or "dotnet ef migrations script" from the command line.
Note: You can get the code download for this application by clicking on the "GET CODE DOWNLOAD" button right below my byline at the beginning of this article.
About the Author
Eric Vogel is a Senior Software Developer for Red Cedar Solutions Group in Okemos, Michigan. He is the president of the Greater Lansing User Group for .NET. Eric enjoys learning about software architecture and craftsmanship, and is always looking for ways to create more robust and testable applications. Contact him at [email protected].