C# Corner
Azure Mobile Services, Part 3
In Part 3 of this series, Eric Vogel covers how to implement user-level authorization and push notifications using an Azure Mobile Service.
Welcome to the third and final installment of my series on Azure Mobile Services. Today I’ll cover how to update the Windows Store application (from Part 2) with robust authorization rules. I’ll also show you how to add push notifications to the application.
First, let’s add more refined authorization rules to the Azure Mobile Service. Open up the Azure Management Dashboard and click on the Data tab.
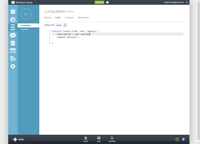
Once you’re on the Data page, click on the Script tab. By default, the Insert operation will be selected. The default Insert(item, user, request) method simply calls request.execute(). To add authorization to the insert operation, a UserId value can be added to the item before the request is executed, as shown in Figure 1.
item.UserId = user.userId;

[Click on image for larger view.] |
| Figure 1. Adding Insert authorization script. |
Now let’s update the Read operation script to only retrieve records for the user’s UserId. The read method accepts a query, a user and a request. The default script executes the request just like the default insert method. To only allow the retrieval of a particular user’s record, add the following code to the beginning of the read method:
query.where({ UserId: user.userId });
Your completed read method should look like Figure 2.

[Click on image for larger view.] |
| Figure 2. Adding Read authorization script. |
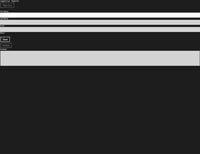
Now, when you run the application, you’ll only see records for your user, as shown in Figure 3.

[Click on image for larger view.] |
| Figure 3. Running app with the updated mobile service authorization. |
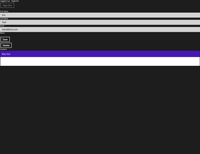
Now add a new contact record to test out the service. You should then be able to retrieve the Contact by selecting it from the list of contacts, as shown in Figure 4.

[Click on image for larger view.] |
| Figure 4. Viewing the New Contact. |
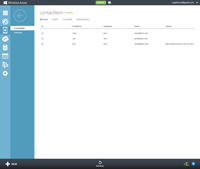
You'll see that the UserId column has been dynamically added to the ContactItem Azure Storage Table, as shown Figure 5.

[Click on image for larger view.] |
| Figure 5. ContactItem Azure Table Dashboard showing UserID column. |
An alternate way to add authorization to the application would be to update the ContactItem class by adding a UserId property, and then setting the UserId property before invoking InsertAsync to update the Azure Storage Table. The benefit of adding the script directly to the Azure Mobile Service is that all clients will get the authorization at once. With the later approach, each client application would need to handle the same authorization. One way is not necessarily better than the other. You should use the approach that best satisfies your users’ requirements.
Adding Push Notifications
Now let’s go over how to add push notifications to the application. The first step is to retrieve the Client Secret and Package SID for your application from the Live Connect Portal. When you get to the front page, select your application and make a note of your Client Secret and SID. Now go back to the Azure Management Dashboard, and click on the Push tab, and enter your application’s Client Secret and Package SID settings.
It’s time to update the application to allow push notifications to be sent when an item has been created, updated or deleted. Open up the App class stored in App.xaml.cs, and add this using statement:
using Windows.Networking.PushNotifications;
Then add a static property named PushChannel with a PushNotificationChannel data type.
public static PushNotificationChannel PushChannel { get; set; }
Now update the OnLaunched method to be asynchronous through the async keyword.
protected async override void OnLaunched(LaunchActivatedEventArgs args)
Then instantiate the PushChannel property in the bottom of the OnLaunched event.
PushChannel = await
PushNotificationChannelManager.CreatePushNotificationChannelForApplicationAsync();
Now, open up the ContactItem class and add this using statement:
using System.Runtime.Serialization;
Then add a PushChannel string property to the ContactItem class with a DataMember attribute that has the same name.
[DataMember(Name = "PushChannel")]
public string PushChannel { get; set; }
The application needs to be updated to set the PushChannel property on an item before it’s sent to the Azure Mobile Service to be created, updated or deleted. Update the Save_Click method to set the PushChannel property.
_item.PushChannel = App.PushChannel.Uri;
Your Save_Click method should now look like the following code:
private async void Save_Click(object sender, RoutedEventArgs e)
{
    _item.PushChannel = App.PushChannel.Uri;

    if (_update)
        await App.MobileService.GetTable().UpdateAsync(_item);
    else
        await App.MobileService.GetTable().InsertAsync(_item);

    await UpdateStatus("Saved");
    await GetContacts();
    ClearItem();
}
Next, update the Delete_Click button to also set the PushChannel on the item.
private async void Delete_Click(object sender, RoutedEventArgs e)
{
    _item.PushChannel = App.PushChannel.Uri;
    await App.MobileService.GetTable().DeleteAsync(_item);
    await UpdateStatus("Deleted");
    ClearItem();
    await GetContacts();
}
Open up the Package.appxmanifest file and ensure that the Toast capable setting is set to "Yes."
Updating Script Settings
Let’s add the insert operation push notification. Go to the Azure Management Dashboard and find the Script settings for the ContactItem table. Update the insert operation script to match the following code:
function insert(item, user, request) {
    item.UserId = user.userId;
    request.execute({
        success: function() {
            request.respond();
            push.wns.sendToastText04(item.PushChannel, {
                text1: item.LastName + ", " + item.FirstName + " was added to your contacts!"
            });
        }
    });
}
When an item is updated, the user now receives a notification that states "x was added to your contacts," where x is the full name of the added contact.
Let’s update the update operation to send a push notification as well. Change the update operation script to match the following code:
function update(item, user, request) {
    request.execute({
        success: function() {
            request.respond();
            push.wns.sendToastText04(item.PushChannel, {
                text1: item.FirstName + " " + item.LastName + "'s contact was updated"
            });
        }
    });
}
Now, when a contact item is updated, the user receives a notification that states "x’s contact was updated," where x is the full name of the updated contact.
Let’s update the delete operation to send a push notification to the user. Update the del operation script to match the code shown in Listing 1.
Now, when someone is deleted from a client application, the user will receive a push notification stating "x was removed as a contact," where x is the full name of the deleted contact. The del operation only receives the id of the item to be deleted so the item is retrieved from the Azure Storage table within the script.
Now run the application, and test out the push notifications. When you create a new contact item, you should receive a push notification as shown in Figure 6.

[Click on image for larger view.] |
| Figure 6. Contact created push notification. |
When you update a contact you should receive a "contact was updated" push notification. Finally, when you delete a contact, you’ll receive an "x was removed as a contact" push notification.
Azure Mobile Services allows you to integrate authorization at either the client or server level. It can be tightly integrated with the Windows Notification Services (WNS) to send push notifications to Windows 8 clients. I see a bright future ahead for Azure Mobile Services and look forward to client SDKs becoming available for Android, iOS and Windows Phone devices.
About the Author
Eric Vogel is a Senior Software Developer for Red Cedar Solutions Group in Okemos, Michigan. He is the president of the Greater Lansing User Group for .NET. Eric enjoys learning about software architecture and craftsmanship, and is always looking for ways to create more robust and testable applications. Contact him at [email protected].