Cross Platform C#
Unit Test Your iOS Apps
Learn how to write both code and tests that can be shared across multiple platforms.
- By Greg Shackles
- 08/26/2013
Unit testing is well established as a good practice for Web and desktop development, but is all too often left behind when developing in the mobile world. In many ways, testing is actually more important with mobile apps than it is in most other environments. That's not to say testing isn't important elsewhere, because it certainly is; but the app distribution model is set up in a way that can make it very difficult to get bug fixes out to your users.
Once your app is out there and users have installed it, those bugs remain until you release a fix. With each fix, you have to wait for it to get through the app approval process, then wait for users to install the update. This isn't the Web, where you can fix a page and it's instantly available to the world; once it's out, it's out. In the meantime, you can easily end up with unhappy users and bad reviews that will stick with you for a long time. Even outside of bugs, the bar for UX quality has been raised, even in the realm of enterprise apps. Users expect a great experience, and it's your job as an app developer to deliver on this expectation.
In addition to avoiding these problems, setting up tests for your apps also brings in all of the usual benefits of testing that you're used to on other platforms. You can quickly and easily refactor your apps with the safety net of a test suite and be reasonably sure that you didn't create any unintended side effects. Writing testable code leads you toward a better, more shareable architecture, and tests can help you verify compatibility across each platform you want to target.
In this article, I'll take a look at how you can write both code and tests that can be shared across multiple platforms. Specifically, I'll be sharing code between standard .NET and iOS apps, but the approach here could be extended to other platforms as well, such as Android or Windows Phone. Running tests on each targeted platform also has the advantage of letting you observe how your code behaves on each platform, and even see how well it performs on real devices independently of the app surrounding it. Often you'll find that the simulator can be deceiving when it comes to performance, so this can be a powerful tool for diagnosing performance problems. In the case of iOS, it can even help you smoke out problems you'll hit when running on a real device where the runtime will try and just-in-time (JIT) compile, which isn't allowed by iOS and will cause your app to crash.
Let's Code
Start out by creating a new C# class library named SharedLibrary. This is just a standard .NET class library that you would use on any other .NET desktop platform. For this example, you'll create the framework for an app that allows the user to search a database of beers and return information about the beers. First, you'll need a model, so add a new class named Beer:
namespace SharedLibrary
{
  public class Beer
  {
    public int Id { get; set; }
    public string Name { get; set; }
  }
}
With the model in place, define the interface for a class that searches for a beer based on a query. In a real app this would most likely call out to a Web service or query a local database:
using System.Collections.Generic;

namespace SharedLibrary
{
  public interface IBeerSearcher
  {
    IList<Beer> FindBeers(string query);
  }
}
In this app, it's easy to imagine the user trying to search for the same query multiple times, so wrap this search client in a service that keeps a simple in-memory cache that maps queries to their results, as shown in Listing 1.
Listing 1. Wrapping a search client in a service that keeps a simple in-memory cache.
using System.Collections.Generic;

namespace SharedLibrary
{
  public class SearchService
  {
    private readonly IBeerSearcher _beerSearcher;
    private readonly IDictionary<string,
      IList<Beer>> _searchCache = new Dictionary<string, IList<Beer>>();

    public SearchService(IBeerSearcher beerSearcher)
    {
      _beerSearcher = beerSearcher;
    }

    public IList<Beer> FindBeers(string query)
    {
      if (string.IsNullOrWhiteSpace(query))
        return new List<Beer>();

      if (_searchCache.ContainsKey(query))
        return _searchCache[query];

      var beers = _beerSearcher.FindBeers(query);

      _searchCache[query] = beers;

      return beers;
    }
  }
}
Now that you have the framework for your shared library in place, you can set up some tests to verify the behavior of this SearchService class. Add a new console application to the solution named SharedLibrary.Tests. Just like before, this will simply be a standard .NET console application. Once the project is created, delete the Program.cs file that's added to the project by default.
For these tests you should use NUnit, which you might already be familiar with from writing tests for other platforms. More specifically, you should use NUnitLite, a more portable subset of NUnit that still includes most of the functionality of the full framework with which you're familiar. The reason for using NUnitLite is that it's what's available for use on mobile platforms such as iOS, so this will help make sure your tests can be compiled and run on these platforms. If you'd prefer, you can use the full NUnit framework here -- just be careful to only use methods that are available in both frameworks.
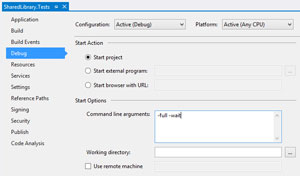
You can add NUnitLite to the project using NuGet, the same way you would for any other package. The package will include its own Program.cs file that allows you to run the tests as a console application. You can also run the tests via other runners, such as ReSharper, if you'd prefer. Here, just stick with the console application to keep things simple. In the project properties for SharedLibrary.Tests, add the command-line arguments "-full -wait" (see Figure 1). This will tell NUnitLite to run all tests in the suite, and wait for input before exiting the program. You should also add a reference to the SharedLibrary project so that you can add tests for those classes.
 [Click on image for larger view.]
Figure 1. Add the command-line arguments "-full -wait" in the project properties for SharedLibrary.Tests.
[Click on image for larger view.]
Figure 1. Add the command-line arguments "-full -wait" in the project properties for SharedLibrary.Tests.
Mocking
If you're familiar with testing on other platforms, you're probably familiar with mocking out dependencies. In doing so you probably took advantage of some sort of mocking library that made it easy to take a class or interface and mock out its behavior. Unfortunately, these libraries generally create proxies that rely on runtime code generation to provide that behavior, which means they can't be used on iOS where JIT compilation isn't allowed. It's still possible to use mocking by doing a little more work; fortunately, it's straightforward to do so.
Add a new class to the test project named MockBeerSearcher:
using System;
using System.Collections.Generic;

namespace SharedLibrary.Tests
{
  public class MockBeerSearcher : IBeerSearcher
  {
    public Func<string, IList<Beer>> FindBeersBody { get; set; }

    public IList<Beer> FindBeers(string query)
    {
      return FindBeersBody(query);
    }
  }
}
This class implements the IBeerSearcher interface defined earlier, and allows the body of the FindBeers method to be injected via a public property. This requires a little more work to maintain, but is relatively simple and will work on any platform you need it to. (You could also take advantage of code-generation techniques such as T4 templates to help generate these classes for you instead of having to code them by hand.)
Now that you have a mock searcher, add some service tests. Add a new class to the project named SearchServiceTests, as shown in Listing 2.
Listing 2. Adding a new class to the project named SearchServiceTests.
using System;
using System.Collections.Generic;
using NUnit.Framework;

namespace SharedLibrary.Tests
{
  [TestFixture]
  public class SearchServiceTests
  {
    [Test]
    public void FindBeers_EmptySearch_ReturnsEmptyList()
    {
      var searcher = new MockBeerSearcher();
      var searchService = new SearchService(searcher);

      var beers = searchService.FindBeers("");

      Assert.AreEqual(0, beers.Count);
    }

    [Test]
    public void FindBeers_FirstSearchForQuery_FetchesAndReturnsResults()
    {
      var expectedResults = new List<Beer> { new Beer { Id = 42, Name = "Duff Dark" } };
      var searcher = new MockBeerSearcher();
      searcher.FindBeersBody = query => expectedResults;

      var searchService = new SearchService(searcher);

      var results = searchService.FindBeers("duff");

      Assert.AreEqual(1, results.Count);
      Assert.AreEqual(expectedResults, results);
    }

    [Test]
    public void FindBeers_SecondSearchForQuery_ReturnsCachedData()
    {
      var expectedResults = new List<Beer> { new Beer { Id = 42, Name = "Duff Dark" } };
      var searcher = new MockBeerSearcher();
      searcher.FindBeersBody = query => expectedResults;

      var searchService = new SearchService(searcher);

      var results = searchService.FindBeers("duff");

      Assert.AreEqual(1, results.Count);
      Assert.AreEqual(expectedResults, results);

      searcher.FindBeersBody = delegate { throw new InvalidOperationException(
        "this should not get called"); };

      results = searchService.FindBeers("duff");

      Assert.AreEqual(1, results.Count);
      Assert.AreEqual(expectedResults, results);
    }
  }
}
In the class shown in Listing 2, you're testing three basic scenarios. The first one is simply testing that when an empty string is provided, an empty list of results is returned. After that, you're testing that the first search for a query hits the searcher, which is mocked out, and that subsequent searches for the same query use the in-memory cache rather than calling the searcher. For the last case, you know the cache is being used because if the searcher were called again an exception would be thrown, and the test would fail.
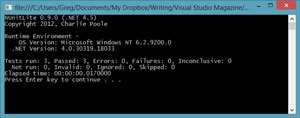
If you run the test application all three tests should pass, as seen in Figure 2.
 [Click on image for larger view.]
Figure 2. All three of the test application tests pass.
[Click on image for larger view.]
Figure 2. All three of the test application tests pass.
Going Mobile: iOS
The tests pass -- that's great! But what you really want is to run those tests on iOS to make sure things work there as well.
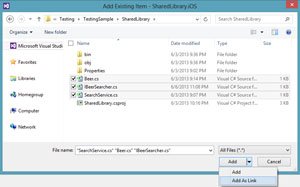
Add a new Xamarin.iOS library to the solution named SharedLibrary.iOS, and add file links to Beer.cs, BeerSearcher.cs and SearchService.cs from the main SharedLibrary project. To add a linked file, open the dialog to add existing files to the project, select those files, and then -- by clicking the down arrow next to the Add button -- select the option to Add As Link (see Figure 3). This effectively adds these files to the current project, but simply references the original copy of the file, which means you only need to make changes to the file in one place and they'll take effect everywhere.
 [Click on image for larger view.]
Figure 3. Using Add As Link to add a linked file.
[Click on image for larger view.]
Figure 3. Using Add As Link to add a linked file.
Because that code was portable across platforms, that's all you need to do to use it on iOS. Next, do the same thing with the tests. Add a new Xamarin.iOS Unit Tests project to the solution named SharedLibrary.Tests.iOS. This is a standard project template that ships with Xamarin.iOS, and provides a simple NUnitLite test runner that runs on iOS. Once the project is added you can see that it's a standard iOS app with the same classes you'll see in any application. In AppDelegate.cs you'll find that it's automatically set up to run tests from the calling assembly, but you could add more tests to the suite here as well if you wanted.
Make sure to add a reference to the SharedLibrary.iOS project so that it knows about those classes. Finally, add a new folder called Tests, and add links to MockBeerSearcher.cs and SearchServiceTests.cs from the main SharedLibrary.Tests project, just as you did in the previous step.
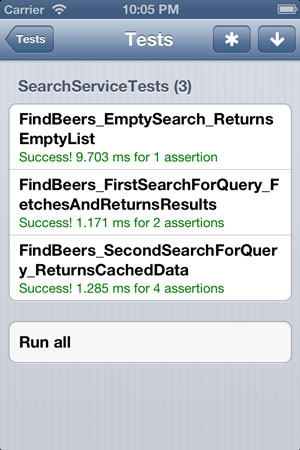
Now that those links are in place, you can simply run the iOS application -- either in the simulator or on an actual device -- to run the tests and see the results. The iOS test runner allows you to drill into test classes and either run everything or choose individual tests or text fixtures to run. Running all the tests in the class should give you a result that looks like Figure 4.
 [Click on image for larger view.]
Figure 4. Successfully running all the tests in the class.
[Click on image for larger view.]
Figure 4. Successfully running all the tests in the class.
Testing, Testing, 1, 2, 3
Testing is important in mobile apps, and as you can see it's very easy to take the same unit tests you'd write on other platforms and run them on mobile platforms like iOS. This article provides you with a very low-overhead means for testing the core of your apps across all the different platforms you're targeting -- and also for making sure that your apps continue to work as expected throughout their lifetime as you make updates and change things around. Always remember that the UX is crucial in your apps, and accuracy and stability are big parts of that. Following these testing practices also allows you to focus manual testing in more productive ways, such as improving the UI and doing exploratory testing that isn't easily covered by tests. Get out there and delight your users with well-tested apps!