C# Corner
Windows Runtime and .NET: Better Together
The new Windows Runtime integrates beautifully with the .NET Framework. Building this app will demonstrate just how well.
Microsoft unveiled its development strategy for Windows 8 at its BUILD conference last month in Anaheim. One of the biggest development shifts was the announcement of the Windows Runtime (WinRT). WinRT is a set of common classes that exposes the Windows APIs similar to COM and .NET, but it's accessible from .NET, C#, and JavaScript. It exposes a lot of functionality that was once only in the land of Win32 and COM, such as low-level device access. The WinRT is all native code and is itself on the same level as Win32.
WinRT integrates seamlessly into .NET -- so much so that you may not realize it's actually calling native code. This tight level of integration is accomplished by WinRT libraries using the same library definition format as .NET (ECMA 355). When you access WinRT from .NET, the API is exposed through native .NET data types. This avoids having to do any pesky marshalling or P/Invoke to call the native code.
Creating the Class
Let's take a quick look at how easy it is to leverage the WinRT from .NET in a Metro-style Application. Your sample application will utilize the asynchronous file operations available in the WinRT to create and read a file.
First you'll create a utility class named FileUtil to handle reading and writing to a local file. Create a new C# Class Library named VSMWinRT.Core, and create a new class file for the FileUtil class.
Next, reference the Windows.Storage and Windows.Storage.Streams namespaces to access the WinRT storage APIs.
 using Windows.Storage;
  using Windows.Storage.Streams;

  namespace VSMWinRT.Core
  {
  public class FileUtil
  {
  public static async Task<bool> WriteToFile(StorageFolder folder,
  string fileName, String content)
  {
  StorageFile file = await  folder.CreateFileAsync(fileName,
  CreationCollisionOption.ReplaceExisting);
  IRandomAccessStream fileStream = await file.OpenAsync(FileAccessMode.ReadWriteNoCopyOnWrite);
  IOutputStream outputFileStream =  fileStream.GetOutputStreamAt(0);
  DataWriter dataWriter = new DataWriter(outputFileStream);
  dataWriter.WriteString(content);
  await  dataWriter.StoreAsync();
  bool result = await  outputFileStream.FlushAsync();
  return result;
  }
   public static async Task<string> ReadFileToString(StorageFolder folder, string fileName)
  {
  string documentText = string.Empty;
  StorageFile file = await  folder.GetFileAsync(fileName);
  IRandomAccessStream fileStream = await file.OpenAsync(FileAccessMode.Read);
  IInputStream inputStream =  fileStream.GetInputStreamAt(0);
  uint fileSize = (uint)fileStream.Size;
  DataReader dataReader = new DataReader(inputStream);
  await  dataReader.LoadAsync(fileSize);
  documentText = dataReader.ReadString(fileSize);
  return documentText;
  }
  }
The WriteToFile method creates a new file and writes the given content to the file asynchronously. The ReadFileToString method reads the contents of a given file asynchronously to a string. Under the covers, our I/O calls are calling native methods to access the file system; but all of this is hidden from the .NET through the use of meta data stored in a .WinMD file.
Building the Application
Now that you have your file utility class created, put it to good use in a .NET Metro style application. First create a new C# Metro Application, as shown in Figure 1.
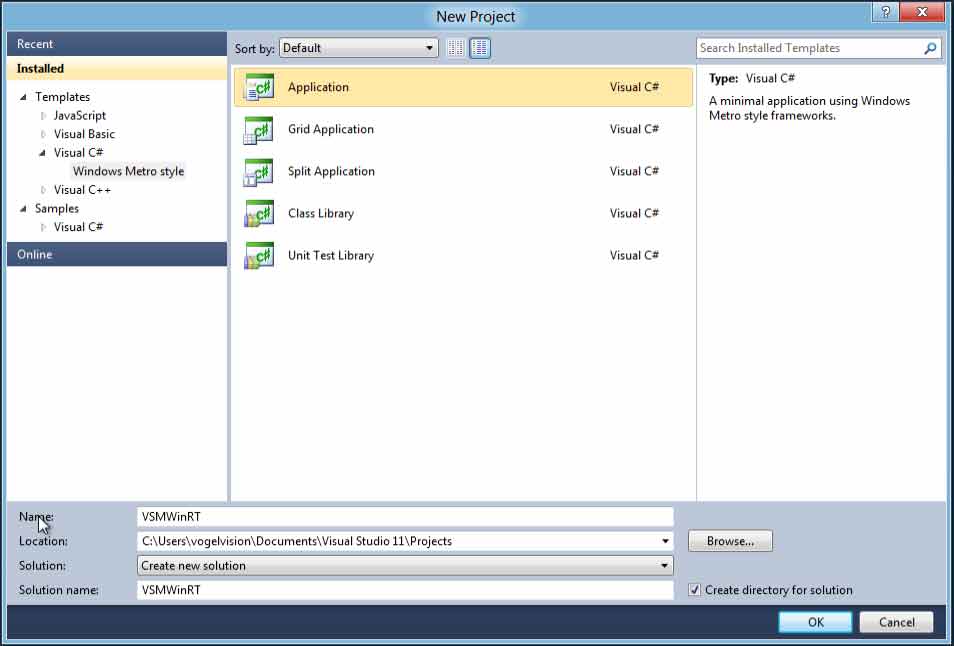
[Click on image for larger view.] |
| Figure 1. Creating the Metro app in C#. |
Next, add a reference to your class library project that contains the FileUtil class, as shown in Figure 2.

[Click on image for larger view.] |
| Figure 2. Adding the reference to the class library. |
Next, open up MainPage.xaml and insert the following markup within the root <Grid> element.
  <StackPanel Margin="4,4,0,0">
  <TextBlock>Metro Memo</TextBlock>
  <TextBox Name="txtDocument" AcceptsReturn="True" TextWrapping="Wrap"></TextBox>
  <Button Name="btnSaveDoc" Click="btnSaveDoc_Click">Save</Button>
  <StackPanel Orientation="Horizontal">
  <TextBlock>Status:</TextBlock>
  <TextBlock Name="lblStatus" Margin="2,0,0,0"></TextBlock>
  </StackPanel>
  </StackPanel>
Run the application and you should see a layout similar to Figure 3.

[Click on image for larger view.] |
| Figure 3. The UI as it looks in Metro. |
Now open up MainPage code behind (MainPage.xaml.cs) so you can utilize your FileUtil class to save the entered memo when the user clicks on the Save button.
First, import the Windows.Storage and Windows.Storage.Streams, and your Core library that contains the FileUtil class.
    using Windows.Storage;
    using Windows.Storage.Streams;
    using VSMWinRT.Core;

    namespace VSMWinRT
    {
    partial class MainPage
    {
    private string _memoFileName = "Test.txt";


    public MainPage()
  {
     InitializeComponent();
     this.Loaded += new RoutedEventHandler(MainPage_Loaded);
  }

   async void MainPage_Loaded(object sender, RoutedEventArgs e)
  {
  string doc = await
FileUtil.ReadFileToString(ApplicationData.Current.LocalFolder,_memoFileName);
  txtDocument.Text = doc;
  }
   private async void btnSaveDoc_Click(object sender, RoutedEventArgs e)
  {
  lblStatus.Text = "Saving...";
  bool success = await FileUtil.WriteToFile(ApplicationData.
  Current.LocalFolder,_memoFileName, txtDocument.Text);
  if (success)
  {
  lblStatus.Text = "Saved!";
  }
  }
  }
  }
Next, store the name of the file in a private variable. Your application always writes to the same file to save the memo. In the constructor, you wire up the Loaded event. In the Loaded event handler, use your ReadFileToString FileUtil method to read an existing file and set the memo contents in the textbox.
Next, set the click event of the Save button. In the click handler, set the Status label to "Saving..." to notify the user that their memo will not be lost. Next, use the WriteToFile method on your FileUtil class to save the file asynchronously. Once the file's saved, update the status label to "Saved!" (Figure 4).

[Click on image for larger view.] |
| Figure 4. Status is updated to "Saved!" |
Similarly to the base WinRT classes, you can create your own WinRT component that can be consumed from any of the WinRT-supported environments. A WinRT component library can currently be created in either .NET (C#/VB.NET) or C++. There are some caveats if you choose to create a WinRT component in .NET, including:
- Your exposed classes must be sealed if they'll be consumed via JavaScript.
- Any part of your public API must be a WinRT type; this includes fields, properties, return values and class members.
- If you use a public structure, it can't have complex types or private fields.
- You can't implement a non-WinRT interface that you don't define in your component. Custom classes can't be generic.
- You can't declare a protected constructor.
Now that you're prepared to create a WinRT component, create one that will expose the FileUtil class methods. There are two approaches to take: the first is to create your entire library as a WinRT component; the second is to create an adapter library to expose the needed functionality. You'll take the latter approach, as it will be a more common path if you're migrating an existing library to WinRT.
Creating an Adapter Library
First create a new C# Class Library. Next, open the properties for the library and change the Output type to be "WinMD File", as shown in Figure 5.

[Click on image for larger view.] |
| Figure 5. Changing the output type to WinMD makes the library compile as a WinRT component. |
Changing the output type will make your class library compile as a WinRT component. Specifically, the change instructs the compiler to create a .WinMD file for your library. If you violate any conditions for a WinRT component, you'll get a friendly compiler error. Make sure you add a reference (Figure 6) to the assembly in which you defined FileUtil to the project as well.

[Click on image for larger view.] |
| Figure 6. Adding an assembly reference. |
Next you'll create a new class named FileUtilComponent, which exposes the WriteToFile and ReadFileToString methods from your FileUtil class.
First, declare your class to be sealed. This will allow you to use FileUtilComponent from JavaScript. Next, define your WriteToFile and ReadFileToString methods. You'll notice that the return type of each method was changed from Task<T> to IAsyncOperation<T>. Task is defined in System.Threading.Tasks and thus not a valid WinRT return type. Fortunately, Microsoft has taken this situation into account and introduced the AsyncInfoFactory factory class that can create an IAsyncOperation<T> version of your Task<T> async methods.
  namespace VSMWinRT.CoreRTComponent
  {
  public sealed class FileUtilComponent
  {
       public IAsyncOperation<bool> WriteToFile(StorageFolder folder, string
               fileName,  String content)
  {
  return AsyncInfoFactory.Create(() => FileUtil.WriteToFile(folder,  fileName, content));
  }

  public IAsyncOperation<string> ReadFileToString(StorageFolder folder, string fileName)
  {
  return AsyncInfoFactory.Create(() => FileUtil.ReadFileToString(folder,  fileName));
  }
  }
  }
Creating the App in JavaScript
Armed with your handy WinRT component, you can now easily create and read text files from C# , C++, JavaScript or VB.NET. Let's see how to consume your custom WinRT component from JavaScript. First, as shown in Figure 7, create a new Javascript Metro Application.

[Click on image for larger view.] |
| Figure 7. Creating the app in JavaScript. |
Next, add a reference to your WinRT component library (Figure 8).

[Click on image for larger view.] |
| Figure 8. As before, add the WinRT component library reference. |
Now set up the UI by opening up default.html and adding the following markup to the body element's content.
  <div>Metro Memo</div>
  <input type="text" id="txtDocument" />
  <div>
  <input type="button" id="btnSave" value="Save" />
  </div>
  <div>
  <span>Status:</span><span id="lblStatus"></span>
  </div>
If you load the application now, it should look almost exactly the same as the .NET version of Metro Memo. Now add the application logic, by opening up js\default.js.
  (function () {
  'use strict';
Start out by setting the initializing the memo's save folder and file name, just as you did in the .NET application.
  var  memoFolder = Windows.Storage.ApplicationData.current.localFolder;
  var  memoFileName = "Test.txt";
The SaveMemo function uses your FileUtilComponent class's WriteToFile method to asynchronously save the memo's text to the memo save file. Set the status label to be "Saving" before the file is saved, and set it to "Saved" once the save is complete.
As you can see, your WinRT component behaves just as you'd expect it to within JavaScript. The only difference you'll notice is use of the "then" method. That allows you to pass a completion callback, an error callback, and a progress callback, in that order. You're only utilizing the completed callback. In a production application, you'll likely want to handle the error callback, and possibly the progress callback as well.
  function  SaveMemo() {
  var fileUtil = new VSMWinRT.CoreRTComponent.FileUtilComponent();
  var memoElem = document.getElementById("txtDocument");
  var statusElem = document.getElementById("lblStatus");
  statusElem
  .innerText = "Saving...";
   fileUtil.writeToFile(memoFolder, memoFileName, memoElem.value).then(function (e) {
  statusElem
  .innerText = "Saved!";
  });
  }
The LoadMemo function uses your FileUtilComponent's ReadFileToString method to asynchronously read a previously-saved memo. If the memo file was read successfully, set the memo text to the file's content.
  function  LoadMemo() {
  var  memoElem = document.getElementById("txtDocument");
  var fileUtil = new VSMWinRT.CoreRTComponent.FileUtilComponent();
  fileUtil
  .readFileToString(memoFolder, memoFileName).then(function (e) {
  memoElem.value = e;
  });
  }
Finally, you'll wire up the save button's click event to call the SaveMemo function and invoke the LoadMemo function. This will load any previously saved memo within the initialize method of our application.
  WinJS.Application.onmainwindowactivated = function (e) {
  if (e.detail.kind === Windows.ApplicationModel.Activation.ActivationKind.launch) {
  document.getElementById("btnSave").addEventListener("click", SaveMemo);
  LoadMemo
  ();
  }
  }
  WinJS
  .Application.start();
  })();
Easy Migration
WinRT plays very well with .NET in the symphony of software development. The tooling offered in Visual Studio 11 makes it easy to create WinRT component libraries out of your existing .NET code and share them across native, managed and virtualized environments. This ease of integration will allow developers to support their existing .NET codebases, while migrating to Metro.
All code in the article is available in the code download. If you would like to see more coverage of the WinRT, please leave a comment.