Papa's Perspective
Expression Blend Drawing Tips
Papa shows how to build a simple button using Expression Blend.
I'm an addict. I admit it. I love creating simple animations and states with Expression Blend. Yeah, Blend isn't perfect and it's not free, but there are some real advantages to using it. I hope after reading this some of you may see how quickly and easily you can create visuals.
I'm going to walk through one way to creat e a visual that could be used for a button (Feel free to get creative and add your own drawings if mine are too boring). The idea is that we have a chevron inside of a circle using paths. Figure 1 is the end result.
 |
| Figure 1. The completed image. |
First, I opened a new Silverlight (could have been Windows Phone) project in Blend and set the background of my page to black, so I could see the drawing better.
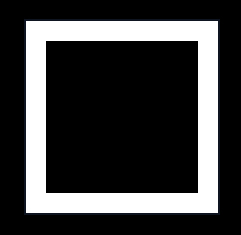
The next thing I want to do is draw the chevron. I start by drawing a square on the page by holding the SHIFT key down, which makes both sides of the rectangle the same length. I made my square's sides about 185 pixels wide. Then I reset the Fill color by clicking the Fill property's Advanced Options square in the properties pane, and selecting Reset. I set the Stroke to white, and the StrokeThickness to 20. At this point I have a square with no Fill color, a white border, and a border thickness of 20. You can see it in Figure 2.
 |
| Figure 2. The first step is to make a square. |
It may not look like a chevron yet, but bear with me. Next I select the square and rotate it 45 degrees, yielding the result in Figure 3. You can do this by either setting the RotateTransform property to 45 degrees in the property pane, or using the mouse by hovering just outside one of the square's corners until you see the arced mouse icon. This indicates you can hold the left mouse button and then rotate the selection. If you use the mouse and hold the SHIFT key down, the rotation will occur in 15 degree increments, which is handy.
 |
| Figure 3. Setting the RotateTransform property to 45 degrees. |
The square (really a Rectangle) can be converted to a Path by right-clicking on the Rectangle and choosing Path | Convert To Path.
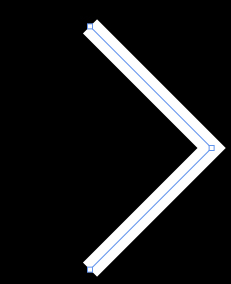
Now that it's a Path, I can remove the points and lines I no longer need and make it look like a Chevron. To do this, I click the A key which allows me to do direct selection. Then I select the two left-most sides of the square and press the DEL key. The result is Figure 4.
 |
| Figure 4. The lines have been converted to Paths, making them easy to delete. |
I want it to look less jagged, so I set the StrokeEndLineCap, StrokeStartLineCap, and StrokeLineJoin properties to Round. Then, using the direct selection key again (A), I move each of the two endpoints closer to each other, reducing the inner angle. It now looks like Figure 5.
 |
| Figure 5. Modifying the chevron. |
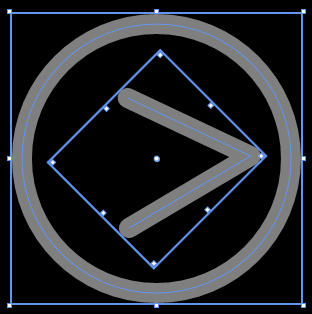
Now that the chevron is drawn, I want to enclose it within a circle, as in Figure 6. So I draw an ellipse holding the SHIFT key down while dragging my mouse to give the ellipse a uniform radius. Notice that the circle takes on the same stroke color and thickness I just used with the chevron's Path (nice feature of Blend to remember that). Then I select both drawings and set their Opacity to 50% by dragging the Opacity value in the property pane to the left (or you can simply type 50).
 |
| Figure 6. Final tweaking to the image. |
At this point the visual is created. Next time I'll demonstrate how to add visual states to make it animate! If you followed along, how did yours turn out?
About the Author
John Papa is a Microsoft Regional Director and former Microsoft technical evangelist. Author of 100-plus articles and 10 books, he specializes in professional application development with Windows, HTML5, JavaScript, CSS, Silverlight, Windows Presentation Foundation, C#, .NET and SQL Server. Check out his online training with Pluralsight; find him at johnpapa.net and on Twitter at twitter.com/john_papa.