Visual Studio Toolbox
How To Simplify the Dreaded Task of Documentation Publishing with GitHub Pages
You don't have to reinvent the Web site to publish some documentation for your project. Take advantage of GitHub Pages to build almost point-and-click doc sites.
- By Terrence Dorsey
- 03/04/2015
Documenting software projects doesn't have to be difficult. The writing part is tough to avoid (though I'll have some tips on that later). You can take care of the publishing part pretty easily, however, without falling down the rabbit hole of writing your own CMS or Web framework -- though these continue to be popular procrastination strategies for developers who'd rather write code than documentation.
Here's the trick: If you're using GitHub as your source code repository, you can take advantage of the service's built-in GitHub Pages feature to publish, host, and even build and render your Web-based documentation.
Simply hosting your documentation site on its own isn't such an amazing feat. These days it's usually a simple process to spin up a server and push your site up. Usually, but not always. There are costs in time and money to set up and manage a Web server even if you're working on your own. And that's the best-case scenario. Try navigating the big-company bureaucracy to get a server approved ... and that's before you navigate the big-company IT processes to get it up and running.
On the other hand, if you have a GitHub account, GitHub Pages comes as part of the package. If you have private repositories, such as through an enterprise GitHub account, you can even take advantage of the built-in authentication and organization authorization features to limit who can see and contribute to documentation published with GitHub Pages.
GitHub does have wikis, but they are severely limited in functionality compared to GitHub Pages, which has access to pretty much anything you might employ for a regular Web site including custom CSS, JavaScript, Web frameworks, automatic compilation and more.
So how does all this magic work? Let's take GitHub Pages for a spin with two simple projects that demonstrate the basics.
Static HTML
The simplest version of a GitHub Pages project involves three elements: a repository, a gh-pages branch for the project in that repo's project and HTML files in the gh-pages branch pushed to the repo. That's it.
GitHub takes any HTML files in your gh-pages branch and serves them up as a Web site at the URL http://[accountName].github.io/[repoName]. So, for example, I created a sample project that lives at http://tpdorsey.github.io/simple-docs/. Here's a quick walk-through of the process for creating a site like this.
First, if you're not already working with Git and GitHub, check out my April 2014 article, "Source Code Control with Git and Mercurial," for links to software and tutorials. For this first example, you'll only need Git and a GitHub account. The Git site has a download for Windows that includes Git Bash and Git Gui, and I can assure you both work just fine even on Windows 10 Technical Preview.
On your machine, create a folder for a new project, then initialize the Git repository:
git init
Before you do anything else, create and switch to the gh-pages branch. There's really no reason to work in master for these files:
git checkout -b gh-pages
Create a couple Web pages. I created an index.html file and a sub-page, page1.html. For this project the pages must be actual Web pages, just like you'd create for any other site. My simple file is in Listing 1.
Listing 1: My Simple index.html File
<!DOCTYPE html>
<html>
  <head>
    <title>gh-pages simple example</title>
  </head>
  <body>
    <h1>This is documentation
</h1>
<p>Just a simple HTML page, where you could put some documentation.</p>
<p>Here's a TOC for sub-pages.</p>
    <ul>
      <li><a href="page1.html">page1.html</a></li>
      <li><a href="page2.html">page2.html</a></li>
      <li><a href="page3.html">page3.html</a></li>
    </ul>
  </body>
</html>
It can be as simple or as complicated as you like, but they must be static HTML files.
Commit the files:
git add .
git commit -m "Look ma! Documentation!"
Now go to GitHub and create a repository for the docs. GitHub will show you an example of the command to set this new repo as the remote, which you'll do for your local doc repo:
git remote add origin [repo location]
Now you can push the files from your local documentation repo to a gh-pages branch on GitHub:
git push origin gh-pages
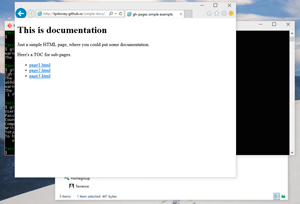
And that's it! GitHub automatically processes valid files in the gh-pages branch. With static pages like the one in Figure 1, your changes should be available immediately at the GitHub Pages site. As I mentioned earlier, the site URL follows a common pattern, using your account name and repo name. You can also find the URL on the Settings page for your GitHub repo.
 [Click on image for larger view.]
Figure 1. GitHub Renders HTML Files in a GH-Pages Branch as a GitHub Pages Site
[Click on image for larger view.]
Figure 1. GitHub Renders HTML Files in a GH-Pages Branch as a GitHub Pages Site
Want to include CSS or JavaScript? Knock yourself out.
Just remember to push any changes to the gh-pages branch of your remote repo to have them show up in your hosted pages. Also, your pages are visible to the same users who have access to your repo: public repos have public sites, while private repos have sites visible only to the users to whom you've given repo access.
Using Jekyll
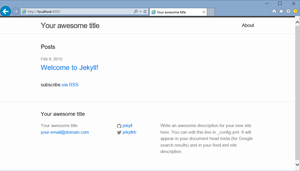
A more sophisticated option for creating sites for GitHub Pages is to use Jekyll (see Figure 2), a Ruby based, templated static Web site generator. Jekyll was written by Tom Preston-Werner, a co-founder of GitHub, and it's natively supported by GitHub Pages.
 [Click on image for larger view.]
Figure 2. Default Jekyll Site
[Click on image for larger view.]
Figure 2. Default Jekyll Site
With Jekyll, your content is written in Markdown-formatted text files, along with some YAML metadata and configuration. Jekyll also uses the Liquid template engine.
When you build a Jekyll site, Jekyll takes your Markdown content and Liquid templates, along with any CSS, scripts, images or other content you've specified, and builds a static HTML site that you can host anywhere. The nice aspect of the GitHub-Jekyll relationship, however, is that you don't push your site to your GitHub repo. Instead, your source content and configuration gets pushed to the repo. GitHub handles building the HTML and pushing it to the hosting site.
Getting Ruby and Jekyll set up on Linux or Mac systems is straightforward. "Apt-get ruby," if necessary, then "gem install jekyll."
On Windows, getting set up takes a bit more effort. The best guide right now is Julian Thilo's "Run Jekyll on Windows." I followed this on a machine running Windows 10 Technical Preview and, once again, assure you it works.
Once everything is set up, open a command prompt with Ruby, change to the folder where you want to set up your project, and run "jekyll new" followed by a folder name for your site:
jekyll new jekyll-docs
cd jekyll-docs
When your site is created, it's already set up as a local Git repository. Add a GitHub project for it, check out a gh-pages branch locally, set the remote to your GitHub repo, and you're ready to push any changes up to GitHub:
git checkout -b gh-pages
Next, open _config.yml in a text editor and customize the configuration details. The Jekyll documentation covers all of your options here. One important detail for sites hosted on GitHub Pages is setting your "baseurl" to the name of your repository. For example, if your project on GitHub is called "jekyll-docs," the base URL setting in _config.yml is:
baseurl: "/jekyll-docs"
This and some other tips are explained in the Jekyll GitHub Pages documentation.
GitHub recognizes the gh-pages branch of your project as a Jekyll project and rebuilds it automatically whenever you push changes. This process takes a bit longer than just pushing up HTML, so give it a few minutes to reflect changes in your actual site.
Jekyll Docs Template
Jekyll is a step forward, but it's really designed as a blog engine. You can certainly use it out of the box, but a nice doc set is going to take some messing about with the templates, and I said this was going to be quick and easy.
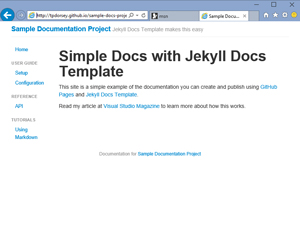
Byron Ruth's Jekyll Docs Template (see Figure 3) is a customized Jekyll project template optimized for flexible, multi-page documentation. It has a built-in, fully customizable sidebar table of contents.
 [Click on image for larger view.]
Figure 3. Jekyll Docs Template Is Optimized for Project Documentation
[Click on image for larger view.]
Figure 3. Jekyll Docs Template Is Optimized for Project Documentation
To use Jekyll Docs Template, just clone the project into a folder for your project:
git clone https://github.com/bruth/jekyll-docs-template.git my-project
After that it works pretty much like any other Jekyll project, with two exceptions. First, the project includes a script for creating new posts with the correct YAML configuration. You use it like so:
ruby bin/jekyll-page "Page Title" ref
In this case, "Page Title" is both the actual title of the page and used to create the post filename. The "ref" here defines which category you want the page to appear within the left-hand navigation.
A note here for Windows users: The script will give you an error, "symlink() function is unimplemented on this machine (NotImplementedError)." It still creates the file correctly in the _posts folder.
The categories are defined within a "sections" array in _config.yml:
# Default categories (in order) to appear in the navigation
sections: [
    ['doc', 'Documentation'],
    ['tut', 'Tutorial'],
    ['ref', 'Reference'],
    ['dev', 'Developers'],
    ['post', 'Posts']
]
Each array within the "sections" array is a category. The first item is the keyword used when creating a post. The second item is the text used for the category title in the page. You can add, remove, or edit these for your own site. Categories only appear in the page if there's at least one post in the category and they appear in the order listed within "sections."
If you want to change the categories up, it's just a simple edit. I like to start with something like this:
sections: [
    ['start', 'Getting Started'],
    ['guide', 'User Guide'],
    ['ref', 'Reference'],
    ['tut', 'Tutorials'],
    ['help', 'Help']
]
Again, just like the default Jekyll setup, if you create a gh-pages branch for the project and push it up to a GitHub repository, GitHub builds it into a GitHub Pages site.
Second, there's a bit of complication with the way Jekyll Docs Template orders pages within your navigation categories. By default, Jekyll orders posts by the date in the filename. Jekyll Docs Template adds the concept of categories, so within each category, the default order for page links is by date, then alphabetically within a given date.
Jekyll Docs Template also supports an "order:" property within the post YAML configuration that overrides the date ordering to specify post order within a category in the navigation.
You can find my Sample Documentation Site example project up on GitHub.
Tips and Tricks
Note that, because the documentation intended for GitHub pages must be in its own gh-pages branch, it can live right alongside the rest of your code base and both your code and the documentation can live in the same GitHub repo.
Because Jekyll posts are Markdown with some YAML header metadata, it's incredibly easy to generate posts programmatically via scripts, build processes, from logs and so on.
For my own projects, I've written a number of scripts that parse useful information out of CSV files, JSON sources (files and API responses), and even source code repositories, then write minimally formatted data out into Jekyll posts to create documentation pages with Jekyll Docs Template.
There are just two details you need to accommodate as you write out "posts," whether you're using plain old Jekyll, Jekyll Docs Template, or some other Jekyll template.
First, as I mentioned earlier, Jekyll, by default, expects post filenames in the format [date]-[title].md. The date is in the form YYYY-MM-DD. If you don't include a date, Jekyll ignores the file. For templates like Jekyll Docs Template, the actual dates don't really matter. (Actually, they may be used for sorting within categories, but you can override that, as I'll explain later.)
Second, you need to start the file with some minimal YAML front matter. Here's an example from Jekyll Docs Template:
---
layout: page
title: "Getting Started"
category: ref
date: 2015-02-08 22:06:08
order: 1
---
That's a whirlwind tour of GitHub Pages and Jekyll that I hope gives you a sense of what's possible with just a little local setup and a GitHub account.
About the Author
Terrence Dorsey is a technical writer, editor and content strategist specializing in technology and software development. Over the last 25-plus years he has worked on developer-focused projects at ESPN, The Code Project, and Microsoft. Read his blog at http://terrencedorsey.com or follow @tpdorsey on Twitter.