Cross Platform C#
Data Binding a Custom Cell in Xamarin.Forms ListView
The ListView in Xamarin.Forms has a lot of options, and the ability to use a custom cell is one of the more useful features.
Data is the lifeblood of every business. Displaying that data is incredibly important. It doesn't matter if the company is a brick-n-mortar or an online business -- data is important. Here's how to create a custom cell to display data within a table using Xamarin.Forms.Cell.
Built-In Cells
A cell is an element used to display items in a table. It describes how an item in a list should be drawn for display. A cell is not a visual element. A cell is a description of a template for creating a visual element. The class Xamarin.Forms.Cell provides a base class for Xamarin.Forms cells. Here's a list of the built-in cell types:
- EntryCell: A cell with a label and a single line of text that can be used to enter data.
- SwitchCell: A cell with a label and a switch.
- TextCell: A cell that contains a title/primary text and a detail/secondary text label.
- ImageCell: A TextCell that also includes an image.
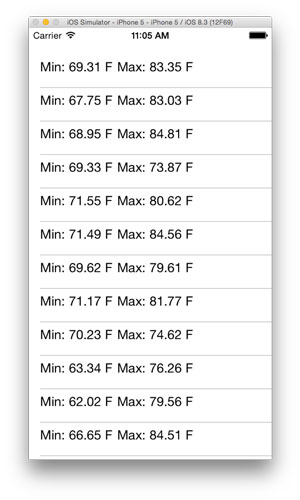
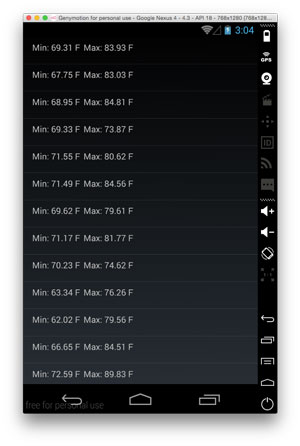
For many uses, the built-in cells will be fine. There are some more advanced uses where these may not be fine. As a simple example, I've created a cell with two labels in it and will be placing data in it. The data comes from the Open Weather API. For this example, the two cells will represent the low and high temperature forecast for Knoxville, Tenn., for a 14-day period starting on June 9, 2015. Figure 1 shows the output in the iPhone simulator. Figure 2 shows the output in the Genymotion Android emulator.
 [Click on image for larger view.]
Figure 1. Custom Cell in ListView in iPhone Simulator
[Click on image for larger view.]
Figure 1. Custom Cell in ListView in iPhone Simulator
 [Click on image for larger view.]
Figure 2. Same Custom Cell in Android Genymotion Emulator
[Click on image for larger view.]
Figure 2. Same Custom Cell in Android Genymotion Emulator
Note: You might find this weather API to be familiar. It's the same example I've used in previous columns.
The code in Listing 1 to create a ListView in Xamarin.Forms is the same no matter if it's on iOS or Android.
Listing 1: ListView in Xamarin.Forms
public class App : Application
{
  ListView lv;
  public App()
  {
    lv = new ListView();
    // The root page of your application
    MainPage = new ContentPage
    {
      Content = new StackLayout
      {
        VerticalOptions = LayoutOptions.FillAndExpand,
        Children = {
          lv
        }
      }
    };
    MainPage.Title = "Weather";
    if (Device.OS == TargetPlatform.iOS)
    {
      MainPage.Padding = new Thickness (0, 35, 0, 0);
    }
    DisplayData();
  }
  async void DisplayData()
  {
    var wsa = new Data();
    var weather = await wsa.GetData("Knoxville, TN");
    var cellTemplate = new DataTemplate(typeof(TemperatureCell));
    lv.ItemTemplate = cellTemplate;
    lv.ItemsSource = weather.list;
  }

  protected override void OnStart()
  {        }

  protected override void OnSleep()
  {        }

  protected override void OnResume()
  {        }
}
Here's what's happening in the Listing 1 code:
- Because this is a one-page app, the ContentPage is going to be set up within the App constructor. You might see things slightly different in more complicated applications.
- A ListView is set up, too, and added as a child control of a StackLayout. The ListView's vertical options are set to fill the screen.
- When running in iOS, there's some padding set so the content of the ListView doesn't intersect with things like the time, signal strength and battery charge that are displayed at the top of an iPhone screen.
- The next step is to go get some data. This is done via an async call made out to the Open Weather Map API using HttpClient, the asynchronous class used to make Web service REST-style calls that was introduced in the Microsoft .NET Framework 4.5.
- Create a DataTemplate instance with the custom cell defined in Listing 2.
- Finally, the ItemSource is set to the data that's going to be displayed. In this case, it's the list of temperatures.
- The methods OnStart, OnSleep, and OnResume are application events that an application can handle. They were left in for display sake but aren't necessary for this example.
The definition of the cell (see Listing 2) is the next step to look at:
- A grid is defined with two columns. In each column is a label.
- A temperature convertor instance is created to handle the formatting in each label. In this specific example, a string is handed in to show that this is the minimum or maximum temperature for the day.
- Assign the data properties that will be displayed. In this example, the data returned may seem a bit strange, thus the "temp.min" and "temp.max" bindings.
Listing 2: TemperatureCell
public class TemperatureCell : ViewCell
  {
    public TemperatureCell()
    {
      Grid grid = new Grid
      {
        Padding = new Thickness(5, 10, 0, 0),
        ColumnDefinitions =
          {
            new ColumnDefinition { Width = new GridLength(10, GridUnitType.Star) },
            new ColumnDefinition { Width = new GridLength(10, GridUnitType.Star)  },
          },
      };
      var minLabel = new Label()
      {
        YAlign = TextAlignment.Center,
        XAlign = TextAlignment.End,
      };
      var maxLabel = new Label()
      {
        YAlign = TextAlignment.Center
      };

      var minConverter = new TempConverter();
      minConverter.description = "Min";
      var maxConverter = new TempConverter();
      maxConverter.description = "Max";
      minLabel.SetBinding(Label.TextProperty, new Binding("temp.min",
        BindingMode.OneWay, minConverter));
      maxLabel.SetBinding(Label.TextProperty, new Binding("temp.max",
        BindingMode.OneWay, maxConverter));
      View = new StackLayout
      {
        Orientation = StackOrientation.Horizontal,
        HorizontalOptions = LayoutOptions.StartAndExpand,
        Padding = new Thickness(15, 5, 5, 15),
        Children = {
          new StackLayout {
            Orientation = StackOrientation.Horizontal,
            Children = { minLabel, maxLabel }
          },
        }
      };
    }
  }
  public class TempConverter : IValueConverter
  {
    public string description { get; set; }
    public object Convert(object value, Type targetType,
      object parameter, System.Globalization.CultureInfo culture)
    {
      var s = String.Format("{0}: {1} F", description, value);
      return s;
    }
    public object ConvertBack(object value, Type targetType,
      object parameter, System.Globalization.CultureInfo culture)
    {
      double divider;

      if (!Double.TryParse(parameter as string, out divider))
          divider = 1;

      return ((double)(int)value) / divider;
    }
Having seen the basics of data binding with a custom cell, there are additional features available in the ListView that should be examined.
Pull To Refresh
One of the most popular features in Twitter apps for mobile, which is now available in other apps, is pull to refresh (PTR). PTR is designed to allow a user to refresh the information displayed using a simple downward-pulling motion with the finger or thumb. PTR is fairly simple to implement and involves these steps:
- The property IsPullToRefreshEnabled must be enabled.
- The .Refreshing event must be handled.
- In the Refreshing event, it's necessary to turn off the refreshing by calling .EndRrefresh.
Here's the code that goes with the ListView to enable the refreshing:
lv.IsPullToRefreshEnabled = true;
lv.Refreshing += Lv_Refreshing;
And here's the contents of the Refreshing event:
void Lv_Refreshing (object sender, EventArgs e)
{
  DisplayData();
  if ( lv.IsRefreshing )
  {
    lv.EndRefresh();
  }
}
Selecting a Cell
Displaying data is the first thing a user needs. The next thing is that user must be able to act on that data. This can be performed by tapping/selecting the cell. The tapped event is set up on the ListView. In the method handling the event, the selected row must be unselected. This is handled by setting.SelectedItem to null.
Note: There are two events that can be used. The first event, and the one shown the following code, is the Tapped event:
lv.ItemTapped += Lv_ItemTapped;
And here's another Tapped event:
void Lv_ItemTapped (object sender, ItemTappedEventArgs e)
{
  ((ListView)sender).SelectedItem = null;
}
Swipe
Mobile is all about immediate action. There are times when selecting a cell, acting on that selection, and then opening another screen for additional input is a multistep process. There are situations where some options can be made simpler. This can be done via a swipe. With a swipe, a user will swipe the cell and then select one of the options listed. Listing 3 shows two options being created. The sequence is:
- Create a Menuitem.
- Set the text of the Menuitem.
- Set the binding of the Menuitem.
- Assign to the Clicked event.
- Add the MenuItem to the ContextActions of a cell.
Listing 3: Swipe Event
var moreAction = new MenuItem { Text = "More" };
moreAction.SetBinding (MenuItem.CommandParameterProperty, new Binding ("."));
moreAction.Clicked += async (sender, e) => {
  var mi = ((MenuItem)sender);
  System.Diagnostics.Debug.WriteLine("More Context Action clicked: " + mi.CommandParameter);
};
var deleteAction = new MenuItem { Text = "Delete", IsDestructive = true }; // Red background
deleteAction.SetBinding (MenuItem.CommandParameterProperty, new Binding ("."));
deleteAction.Clicked += async (sender, e) => {
  var mi = ((MenuItem)sender);
  System.Diagnostics.Debug.WriteLine("Delete Context Action clicked: " + mi.CommandParameter);
};
ContextActions.Add (moreAction);
ContextActions.Add (deleteAction);
Headers and Footers
Headers and footers can be set easily in a ListView. This can be done by setting .Header and .Footer properties, as well as being data-bound.
Wrapping Up
The ListView in Xamarin.Forms has a lot of options, and the ability to use a custom cell is one of the more useful features. It allow developers to craft a UI that's optimal for the specific needs of the application. Along with the ability to use a custom cell, the ListView also allows these custom cells to use the standard features of a ListView. Not only has this article looked at using a custom cell, but it has looked at a number of associated features.
About the Author
Wallace (Wally) B. McClure has authored books on iPhone programming with Mono/Monotouch, Android programming with Mono for Android, application architecture, ADO.NET, SQL Server and AJAX. He's a Microsoft MVP, an ASPInsider and a partner at Scalable Development Inc. He maintains a blog, and can be followed on Twitter.